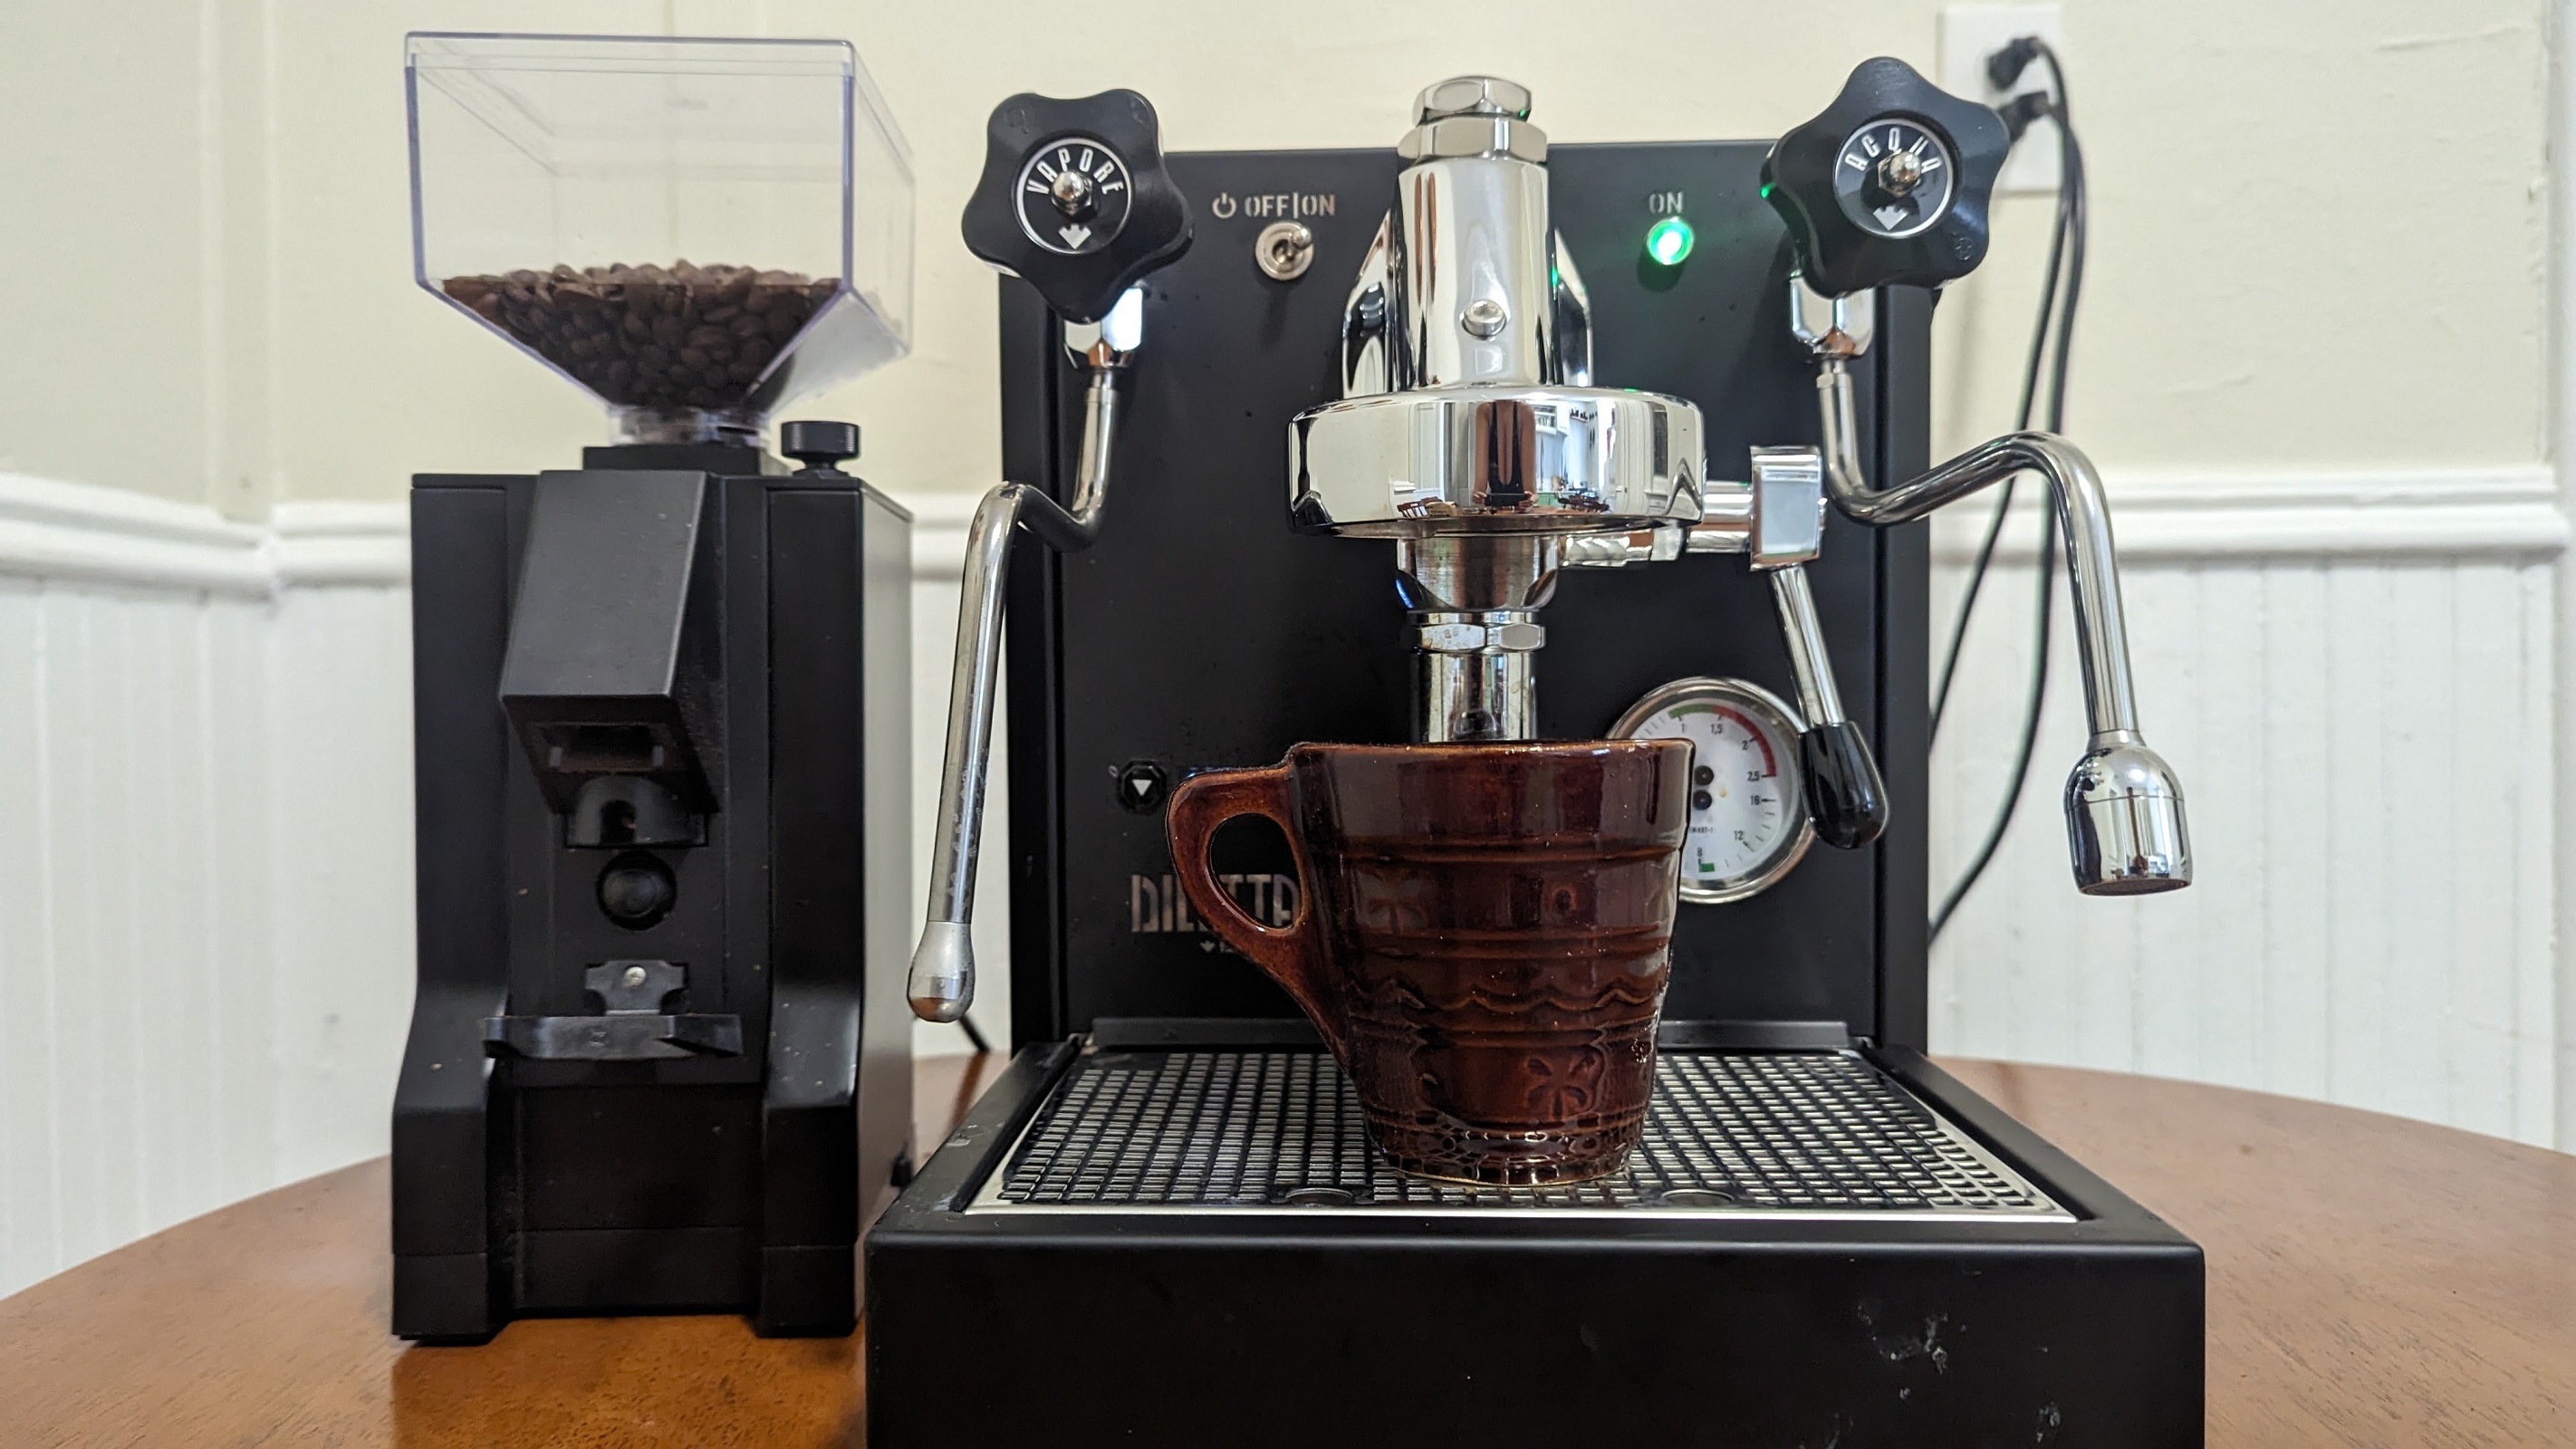
I’ve had espressos before, and I’ve even made them with an automated espresso machine. Still, I’ve never tried making one using an Italian barista-style espresso machine—not until I tested the Seattle Coffee Gear Diletta Bello+ Espresso Machine.
The sleek, black-and-silver espresso machine is handcrafted in Italy and designed to make you crave Italian espresso. Its size alone will tell people that you’re serious about great-tasting espressos. Here’s hoping you have enough counter space for it.
The Diletta Bello+ is an upgraded version of the Diletta Bello Espresso Machine. With a new digital display, you can more easily adjust temperatures and even apply pre-infusion. The steaming and hot water wand can be used while your espresso is extracted to enjoy different espresso-based drinks – like lattes and Americanos – faster. While the price tag is fairly high at $1899, this is the kind of machine you invest in once and have for years.
Through testing the Diletta Bello+ Espresso Machine, I learned that making an espresso is an art. It takes time. This is not a quick-making single-serve coffee maker that you use when you’re running out the door to work. It calls for you to slow down, experiment, and engage in an Italian coffee tradition that has been thriving for over 120 years.
Keep scrolling to find out if I perfected making espresso with this machine, then head to our best coffee maker and best espresso machine line-ups to see how it compares.
Alex Temblador is a freelance journalist who has tested many products, including mattresses, vacuums, grills, kitchen appliances, garden tools, and gym equipment. She works in Dallas, Texas, in her 103-year-old home.
Flavored lattes from coffee shops are her favorite, but she’d be happy with a regular coffee from a gas station as she would with an after-dinner espresso at a five-star restaurant. She prefers coffees with low acidity, usually a darker roast, and if possible, will bring home coffee beans from abroad, finding that they’re more agreeable to her body than American-sold coffees. She gets her caffeine fix from a Miele coffee machine at home, which she won in a contest a few years ago. Alex tested the Seattle Coffee Gear Diletta Bello+ Espresso Machine for two weeks, checking for flavor, ease of use, and consistency.
Seattle Coffee Gear Diletta Bello+: Key specs
| Type of coffee | Espresso |
| Brew time | 20-30 seconds |
| Brew size options | 1-2 oz. |
| Water tank | 3L |
| Power cord length | 4 ft |
| Average noise level | 65dB |
| Dimensions | 11 (W) x 17.75 (D) x 14.5 (H) inches |
| Weight | 45 lbs |
Seattle Coffee Gear Diletta Bello+: price and availability
The Seattle Coffee Gear Diletta Bello+ Espresso machine is priced at $1,899. This is not a cheap machine by any means. However, the level of craftsmanship, combined with the materials and the design, produces a great-tasting espresso. You can buy it directly from Seattle Coffee Gear or Amazon.
Seattle Coffee Gear Diletta Bello+: Setup
Before its release, I tested the Seattle Coffee Gear Diletta Bello+ Espresso Machine, so it did not arrive in the same box or packaging that customers will receive. I’ve seen the packaging, and you can rest assured that it’ll be packed tightly and safely in a large cardboard box. My Diletta Bello+ Espresso Machine arrived secure, with the accessories that come with the machine: one tamper, a brush, two portafilters, and baskets.
You may notice an Eureka Mignon Notte Espresso Grinder, Acaia Lunar Scale, and Frothing Pitcher in my photos. These are not included when purchasing a Diletta Bello+ Espresso Machine but can be purchased separately from Seattle Coffee Gear. (Side note: I found all three of these accessories to work well for me in espresso-making. I highly suggest that you invest in them.)
The Seattle Coffee Gear Diletta Bello+ Espresso Machine is considerably large and heavy. Though I am used to moving king-sized mattresses that I have to test for reviews, I still struggle to carry this machine to the kitchen. Stainless steel is not light by any means. Unfortunately, my kitchen lacks countertop space, so I put this espresso machine on my kitchen table.
It’s a fairly long espresso machine, so your counter must be at least 18 inches deep to fit it. I’d also advise setting it somewhere free of top cabinets, as you won’t be able to access the water tank or the heater on top of the machine if there is something above it. At least the water tank has a handle to carry it to the sink.
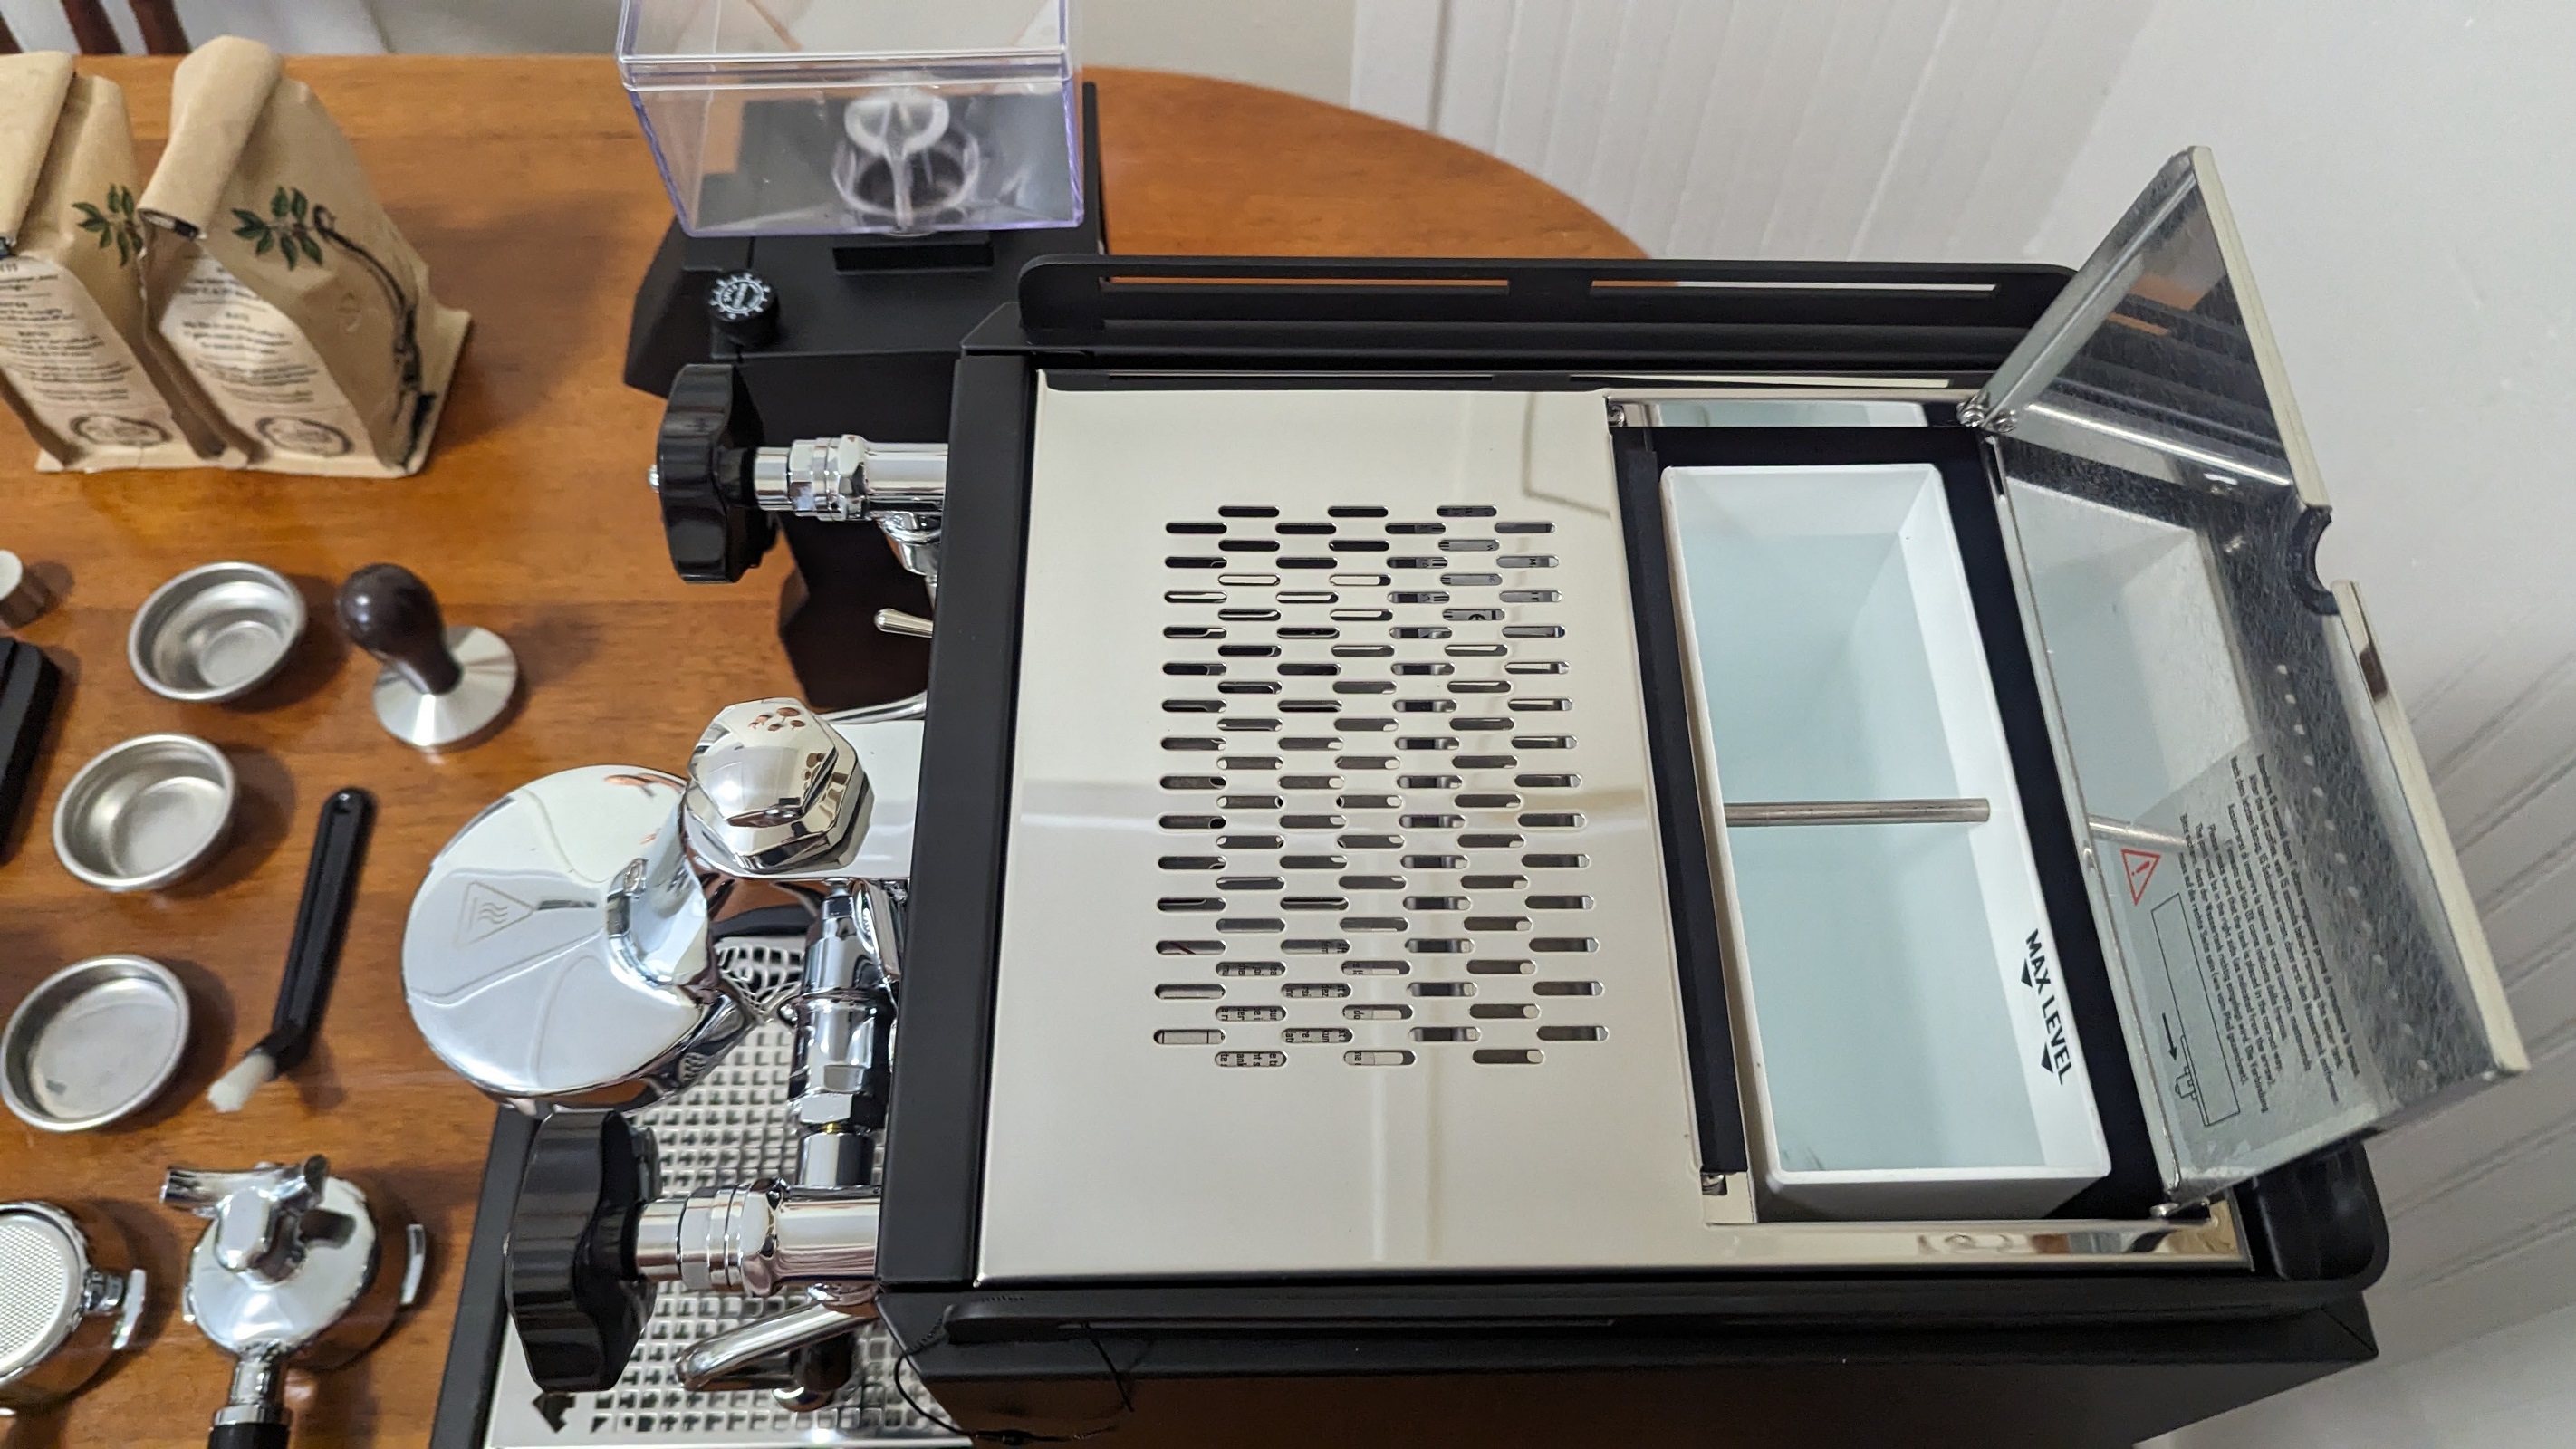
Style-wise, the Seattle Coffee Gear Diletta Bello+ Espresso Machine is an attractive piece of machinery. The silver and black espresso machine is made of stainless steel, which means it is durable and sturdy, designed like a traditional Italian barista-style espresso machine.
The steam and hot water wand can be adjusted away from the machine or over the dip tray. A frothing cup will not fit under both wands and the dip tray at the same time. To utilize them, you’ll have to move the wands to the side of the drip tray.
There is a digital display that showcases the temperature. An up and a down arrow is arranged on either side of the display, and the temperature can be adjusted or the different PID settings can be used. For instance, you can set the machine to sound through the digital display if the water tank needs to be refilled or adjust the pre-infusion settings.
Seattle Coffee Gear Diletta Bello+: Performance
Learning how to use one can feel daunting if you’ve never been a barista or have no experience using a traditional Italian espresso machine. That was the case for me with the Diletta Bello+ Espresso Machine. However, the nice thing about the Diletta Bello+ Espresso Machine is that the whole experience of making an espresso is built on trial and error. Mistakes are expected when figuring out the right temperature, espresso beans, and the fineness of the grounds to create the right kind of espresso for you. And bonus – Seattle Coffee Gear has plenty of online videos that offer great insight into using a machine like this.
To begin my testing process, I removed the water tank, filled it with water, and placed it back into the machine. I like how big the water tank is because it allows me to make many espressos without refilling it daily.
From there, I switched on the power button at the top. The digital display on the bottom left area of the machine turns on and shows the water temperature. The temperature increases as the machine heats up. You can adjust the temperature using the arrows on either side of the digital display.
If you need to change the PID settings, like the temperature from Celsius to Fahrenheit, press the up arrow for five seconds. You’ll see the option pop up and then click through the arrows for other settings like an eco mode timer set in 30-minute increments, standby mode, water alarm buzzer, probe sensor height, and pre-infusion (adjustable between 1 and 10 seconds).
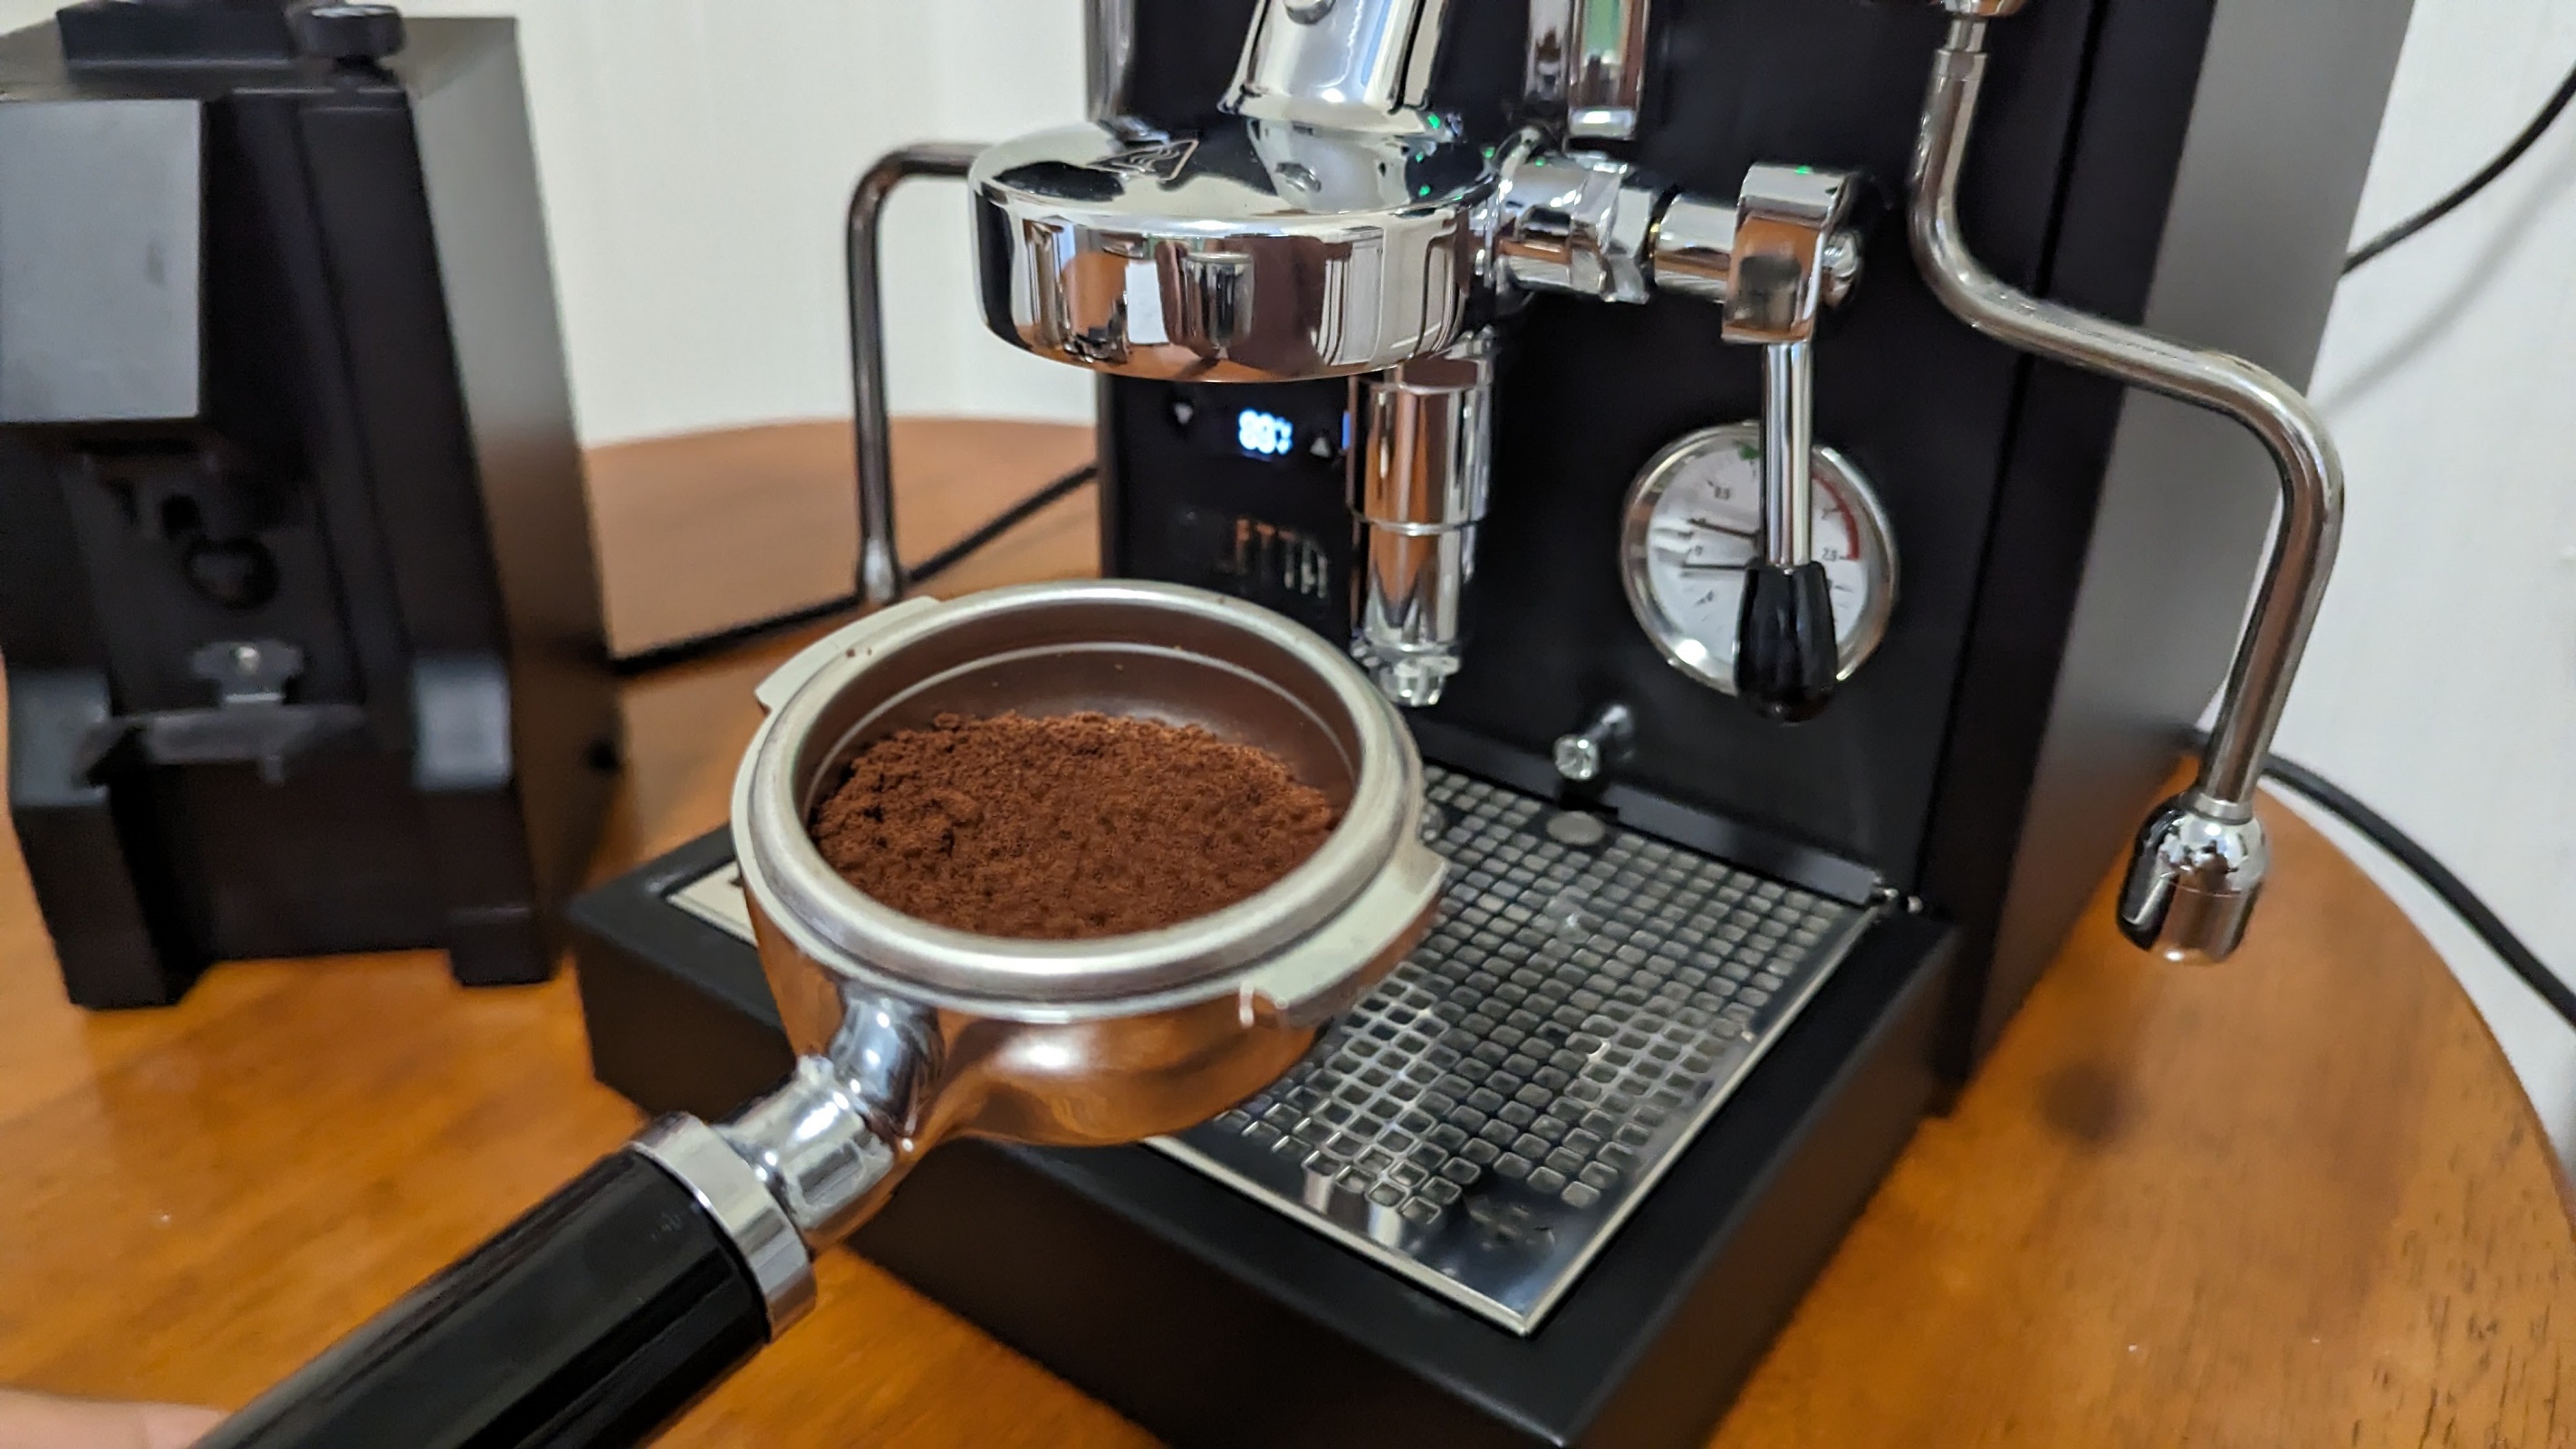
I used all of these different settings and found that they worked great. I liked being notified by a buzzer when the water was low, and I found that a five-second pre-infusion made for the best espresso. Whether or not you use these features, it’s nice to have the option.
The water tank took, on average, 8-10 minutes to heat up to 251 degrees. One of the slightly confusing things about this machine is the PID temperature setting, which is the steam temperature setting. Setting the PID temperature to 251 degrees will result in a brew temperature of 202.5 degrees and a steam temperature of 251. A chart in the instruction guide breaks this down, but essentially, you’ll need to set the PID about 47-48 degrees higher than what you want the brew temperature to be. Confusing – yes, but it’s easy to figure out with the chart.
As I waited for the espresso machine to heat up, I placed my espresso cup on the cup warmer at the top, ground my beans to the desired fineness level, tampered with the grounds, and filled the frothing pitcher with milk. The boiler pressure gauge on the right side of the machine should read between 1 and 1.5 bars before you make an espresso. This can take about 15-18 minutes from when you turn on the machine.
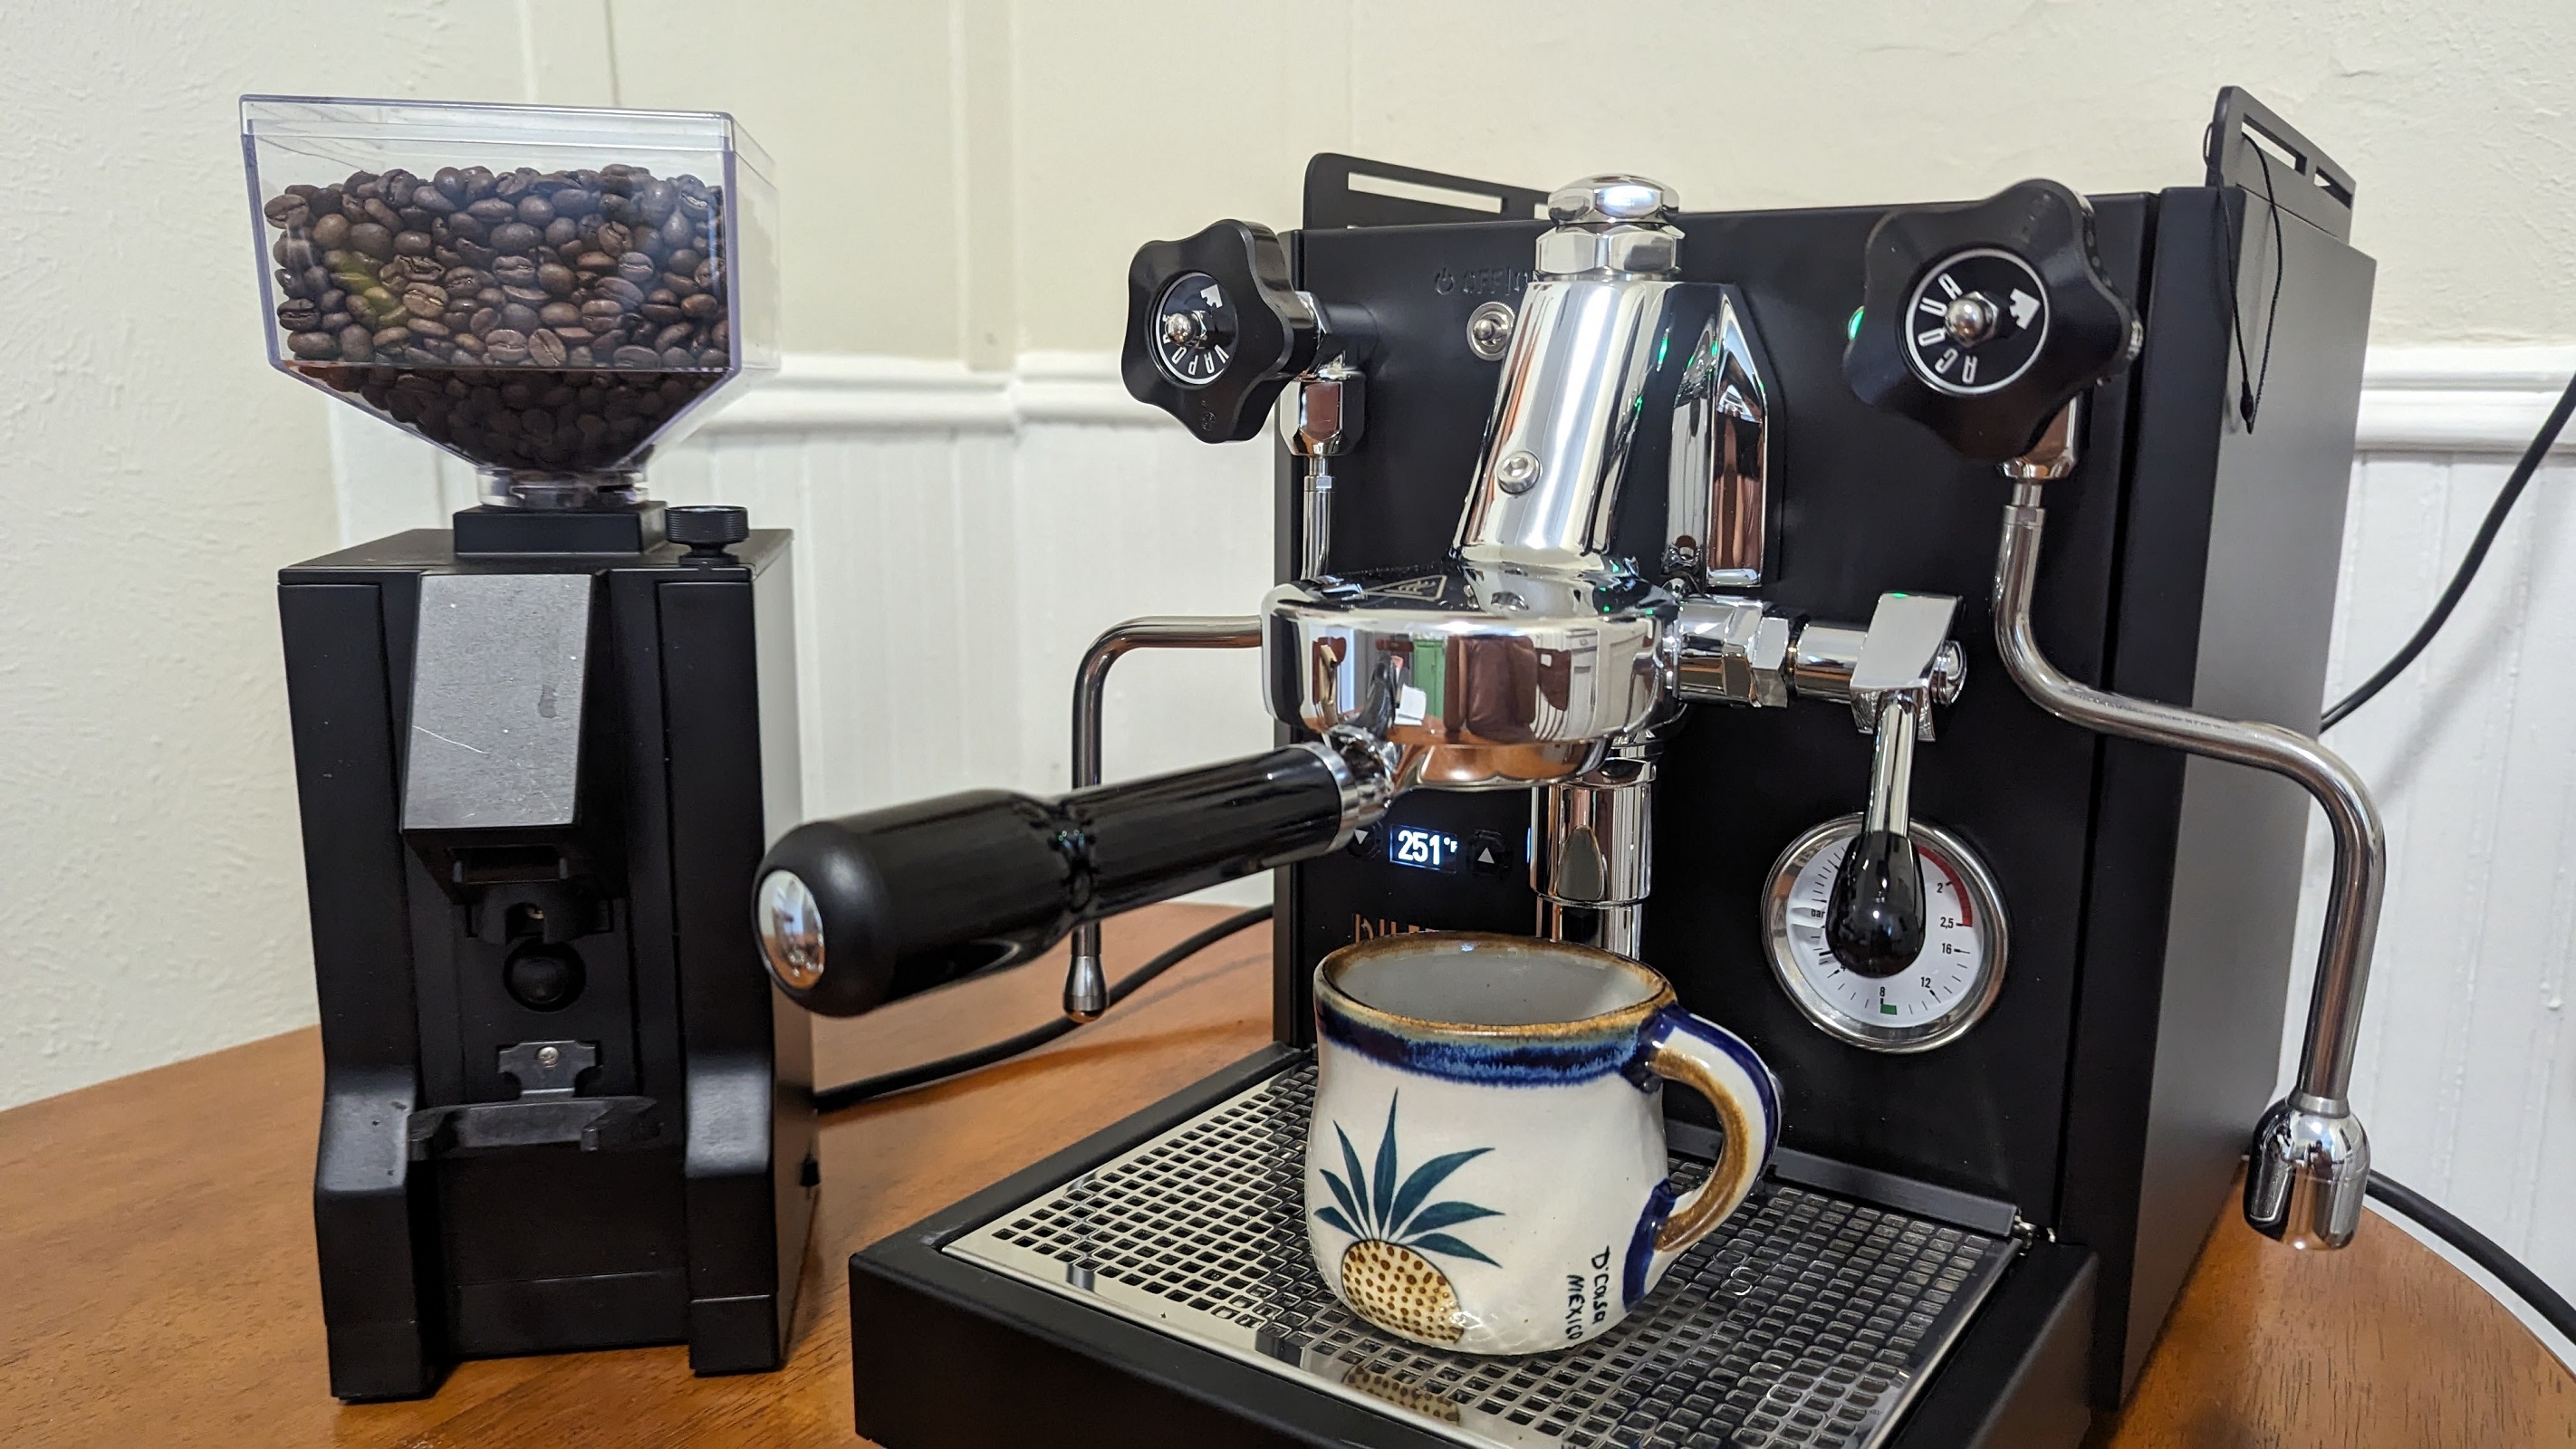
I ran a little water through the brew group before I connected the portafilter. The bottom of the tray has a dip tray that catches all the liquid. It’s easy to remove and clean. Once you put the portafilter into the group and are ready to make your espresso, the water takes about 20 seconds to run through. Ultimately, I had an espresso ready within about 15-18 minutes.
Because I had never used a barista machine before, it took me many tries to figure out what level of fineness I wanted on my coffee grounds or which PID settings worked best for me. Even experts will have to take some time to figure out the little details of this machine.
I love lattes and usually top my espressos with steamed milk and milk foam. This took less than a minute to do. The steaming wand is on the left side of the machine. After placing the wand into the milk, I turned the knob and let the milk steam for a few moments before I frothed the top layer. After I poured the milk and the froth into the espresso, I cleaned the wand with a rag and ran some steam through the pipe.
There is a hot water wand on the right side of the machine. I used it to make Americanos or hot tea. It works the same as the steam wand – turn the knob, and hot water comes out.
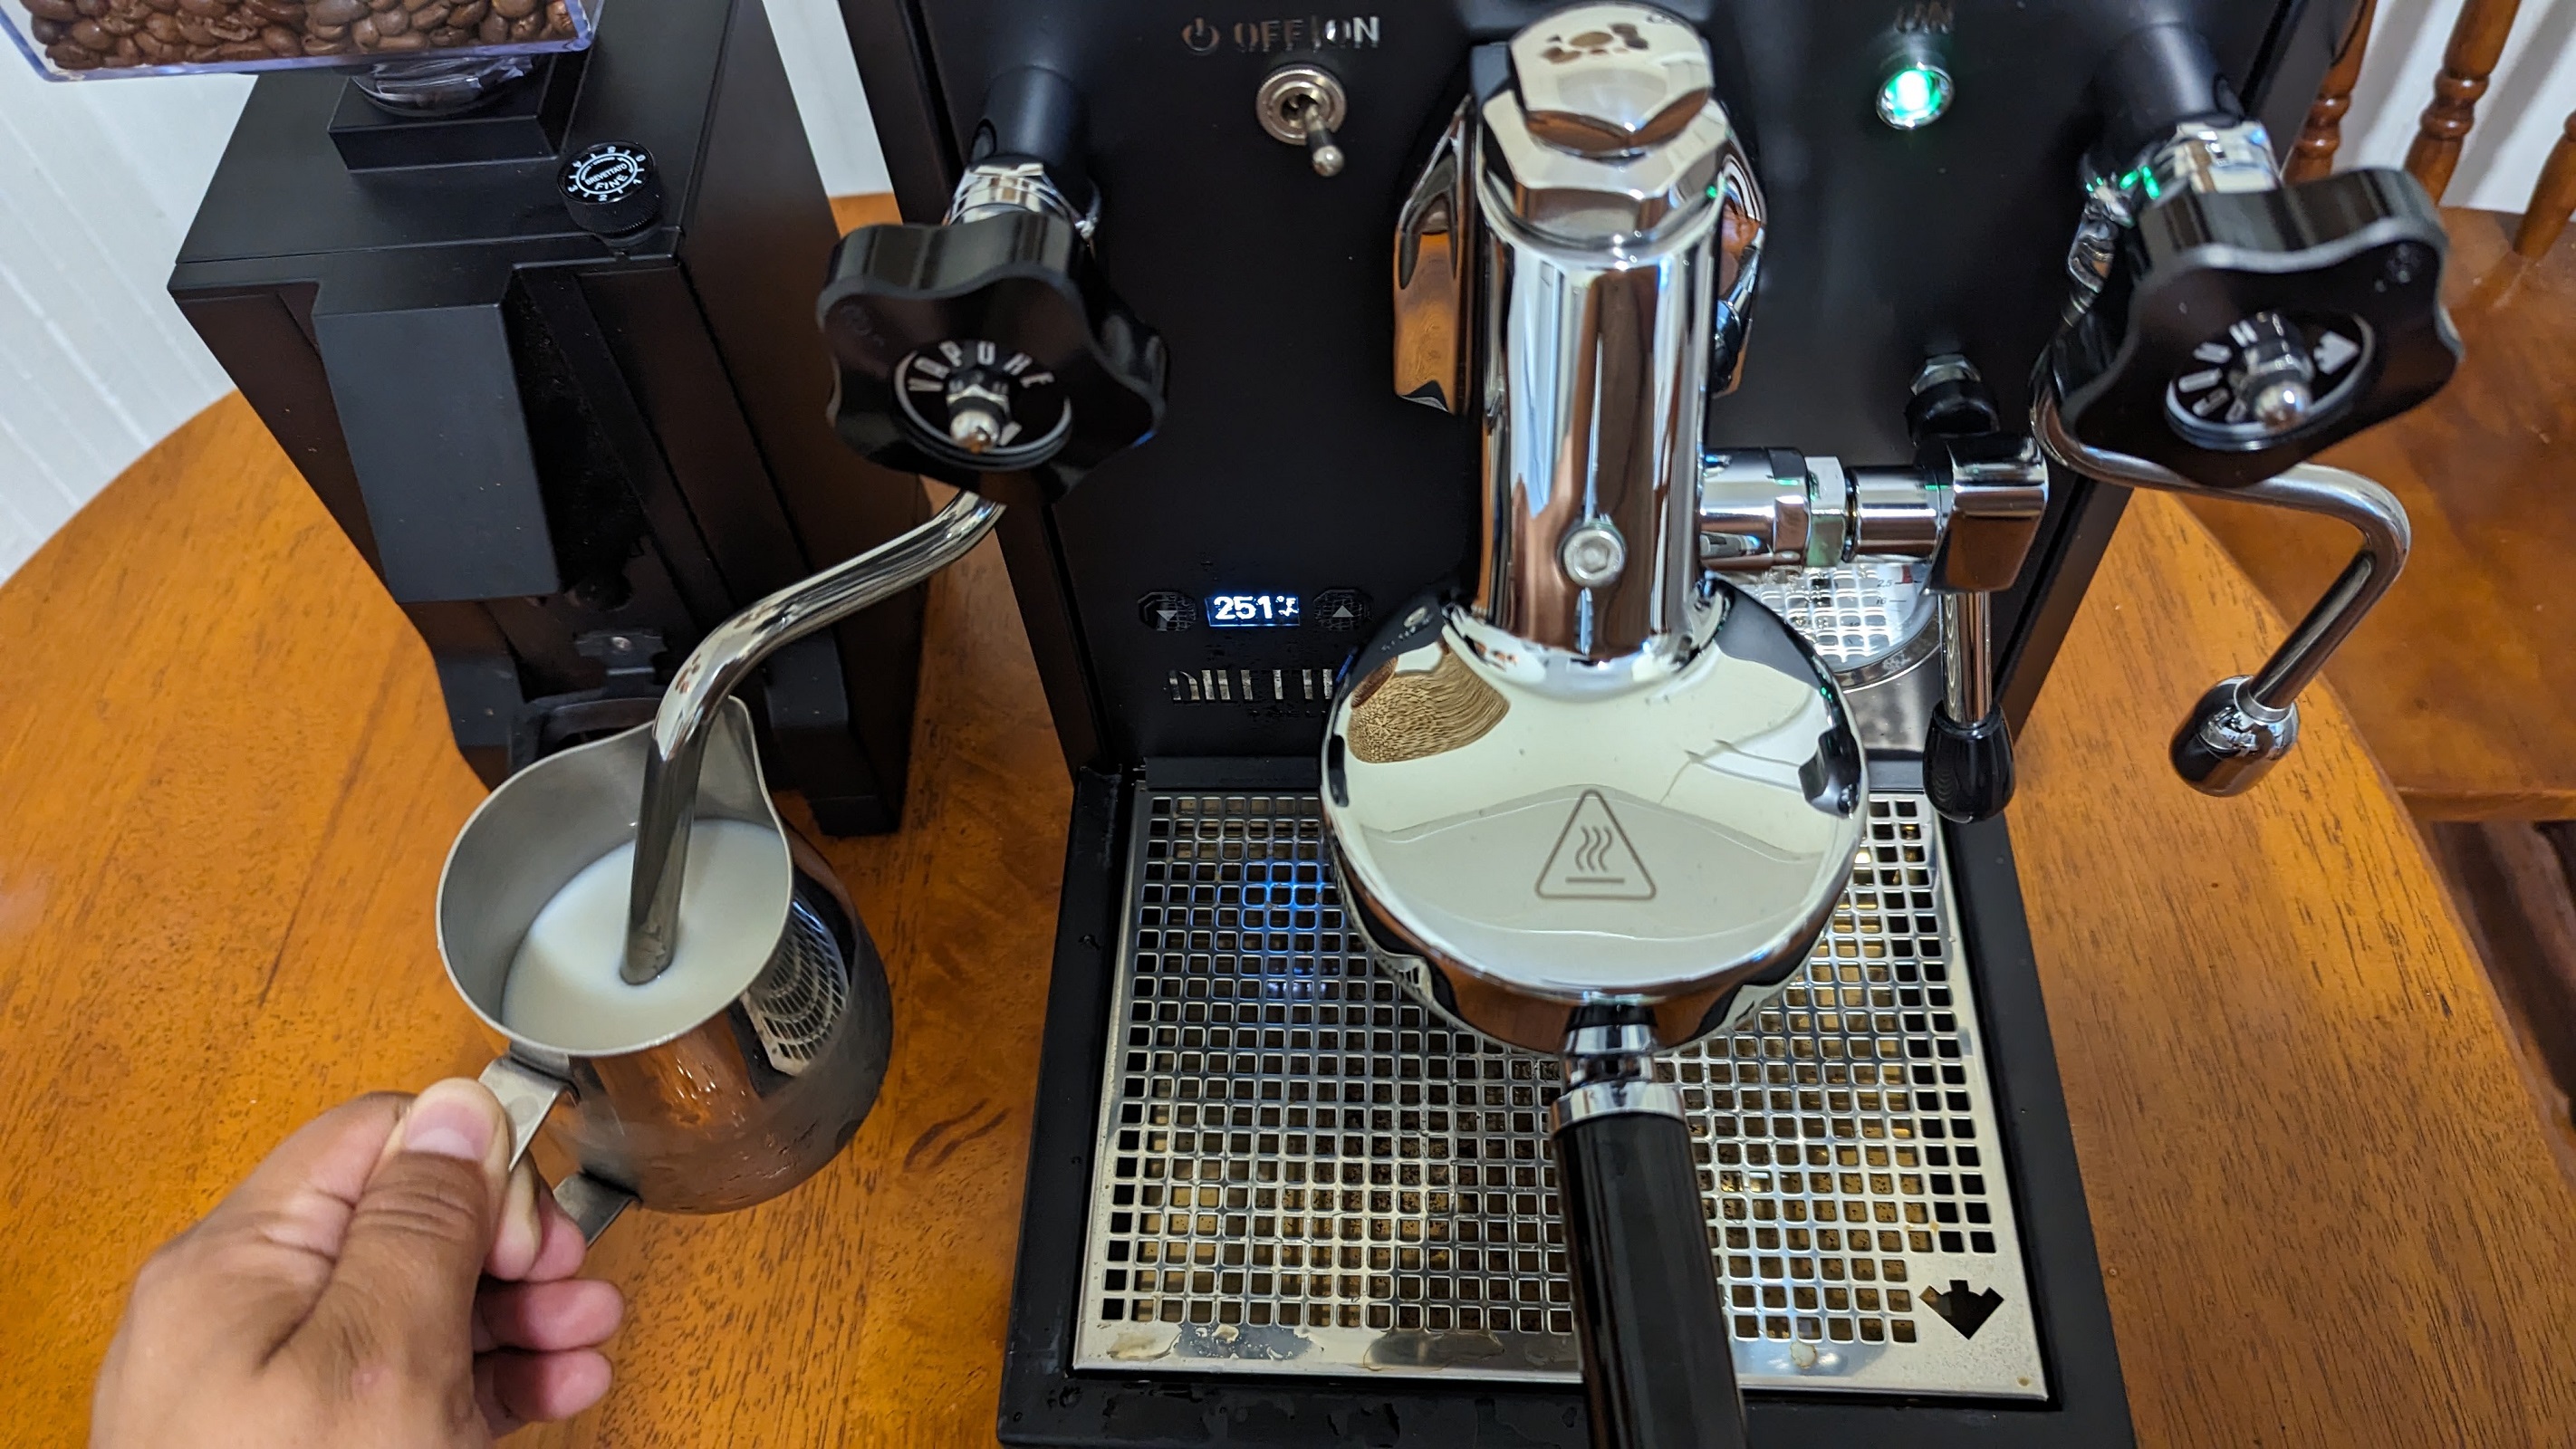
You need to set aside at least 20 minutes to make an espresso and clean up the machine – which involves cleaning the wands and portafilter. You can empty the dip tray when it gets full, every few days, or once a week. Your choice.
Seattle Coffee Gear Diletta Bello+: Taste test
Seattle Coffee Gear sent me whole beans from Tony’s Coffee to use with this espresso machine. It was the Seattle Coffee Gear “Crew Brew Blend,” a medium blend of grape jam and nougat flavors. I love how the company placed a sticker with the “roasted on” date so you know how fresh the beans are.
Throughout the testing period, I made adjustments to the temperature and fineness of the grounds to create an espresso the way I wanted it to taste. This is not a reflection on the espresso machine itself but more on me figuring out what I like and don’t like. Eventually, I figured out how to grind the Crew Brew Blend and extract an espresso, which I enjoyed.
I was quite proud of learning how to use the steam wand. I made many delicious lattes, Americanos, and cappuccinos. At times, I could even create a heart with the foam.
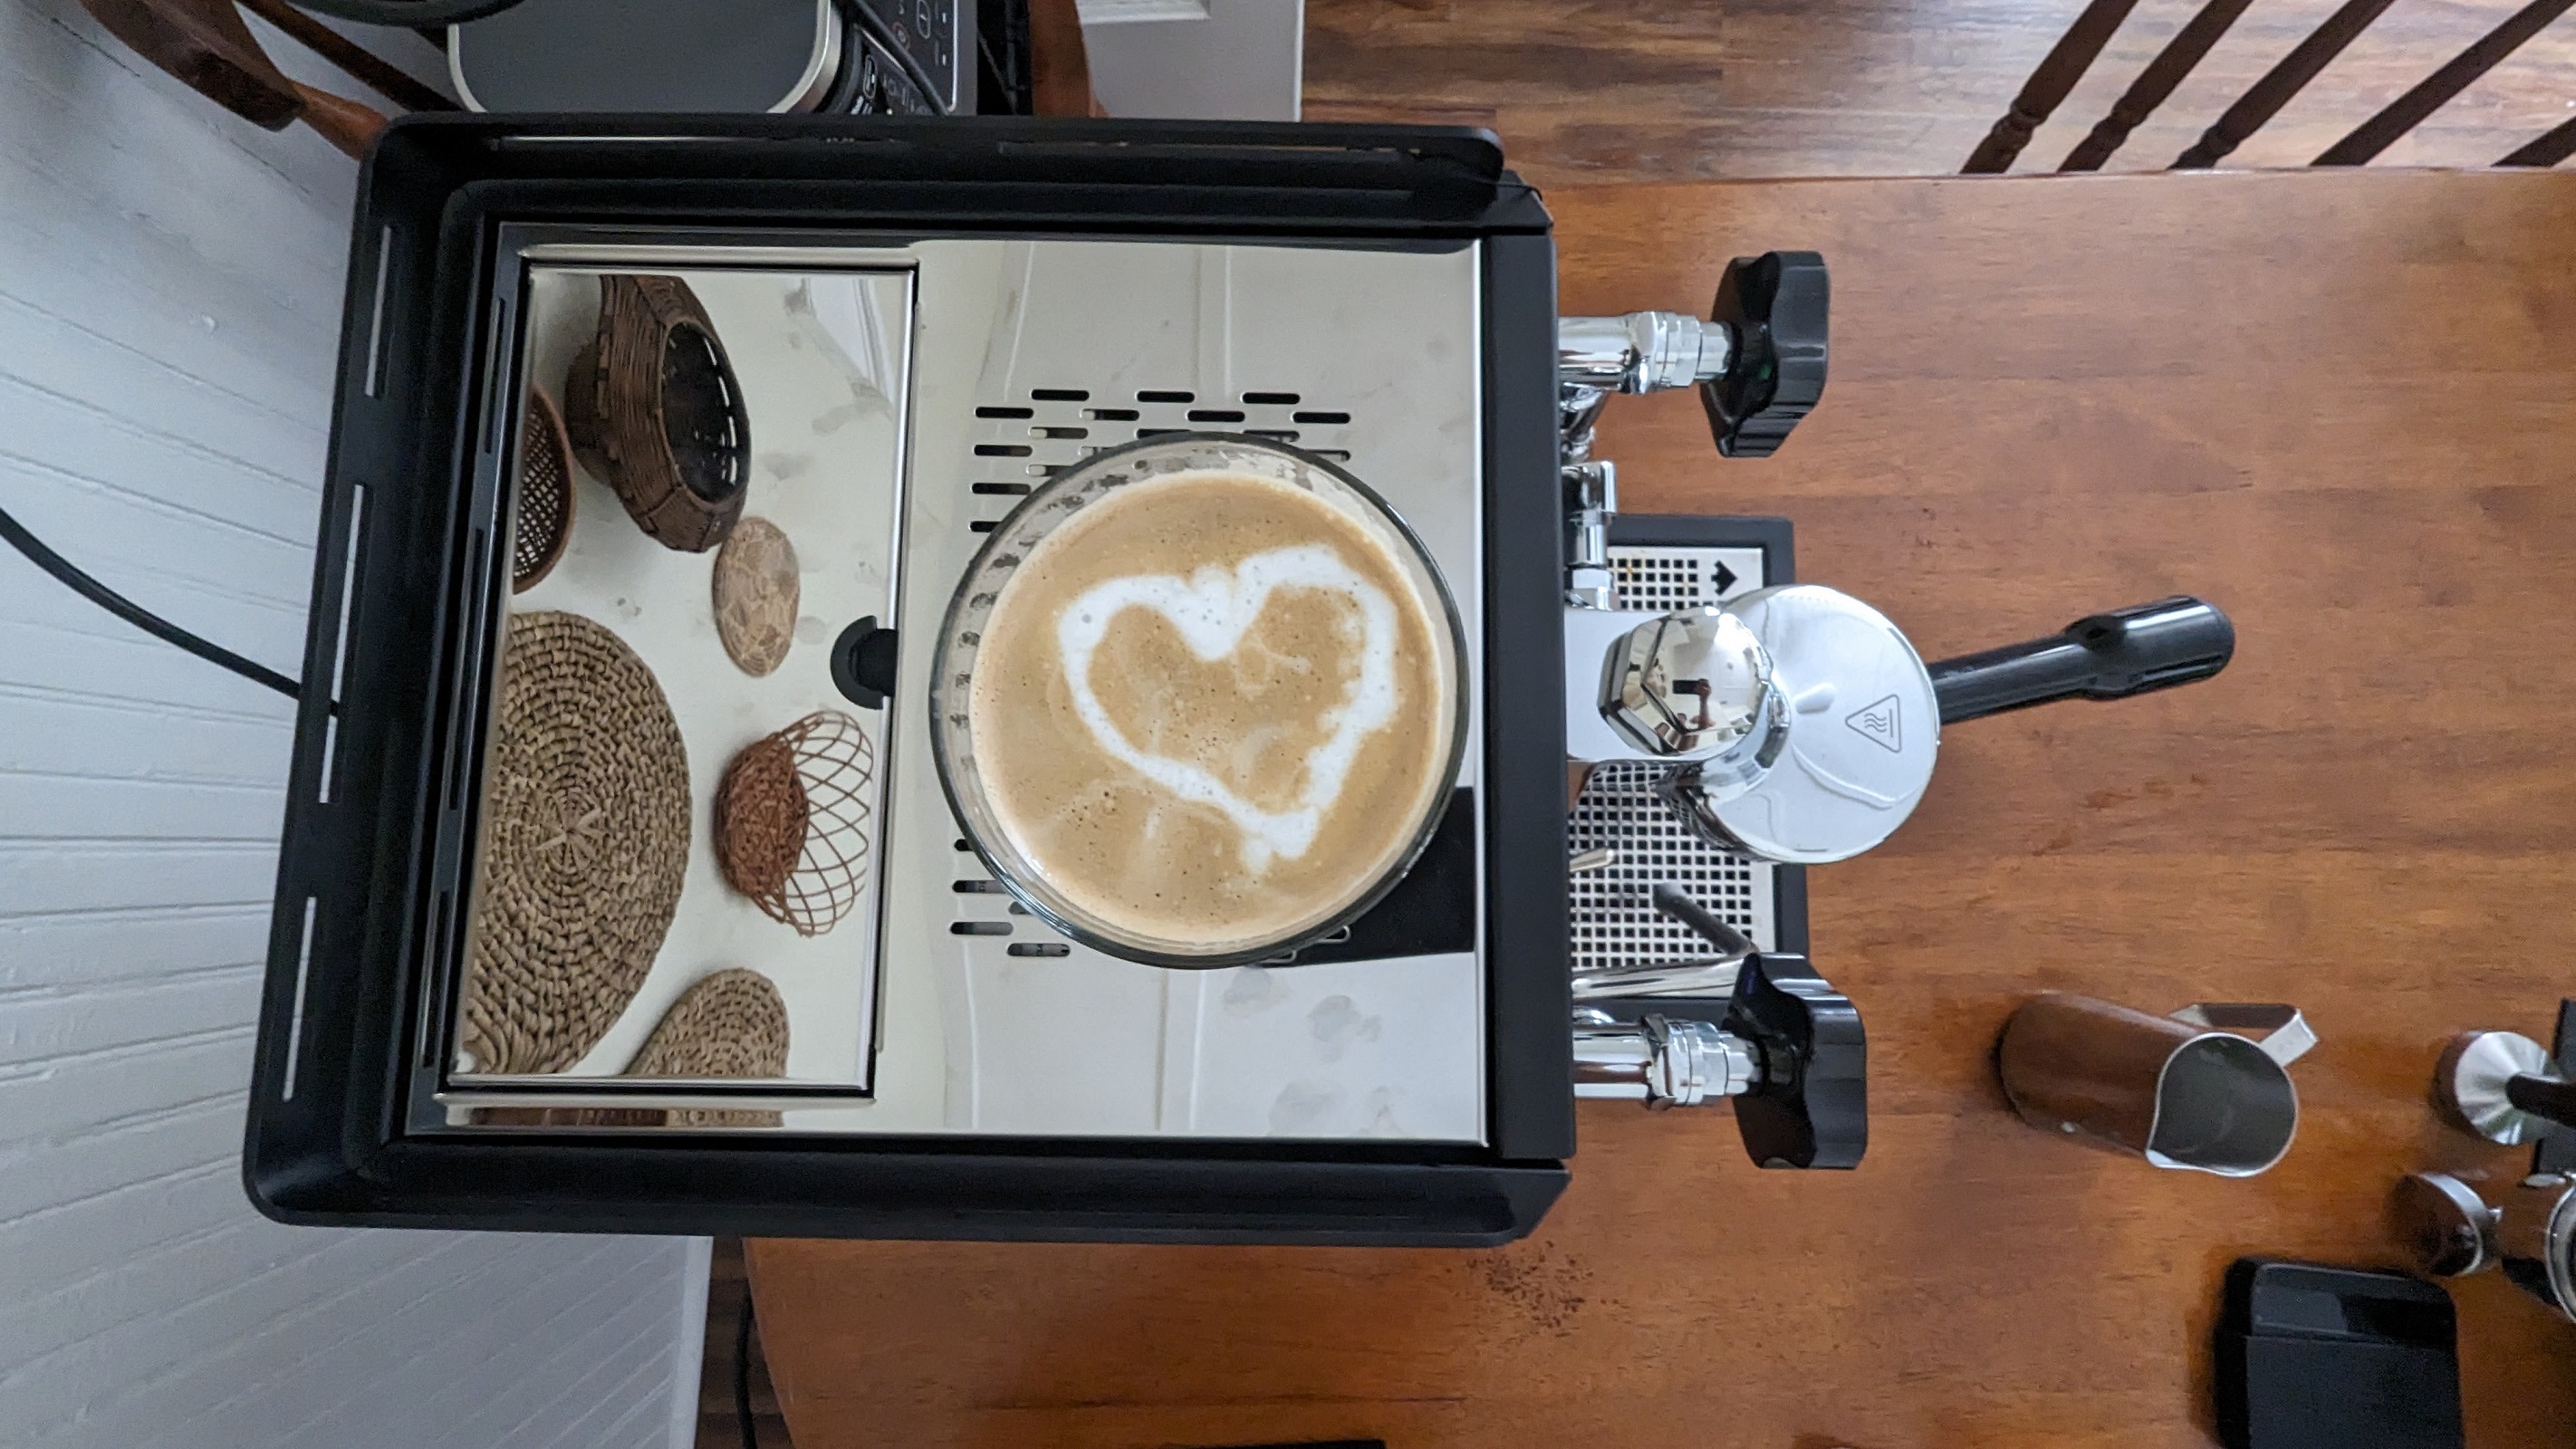
Again – the machine does well in heating the water, keeping the temperature stable, and extracting the espresso. Only through human error do you get an espresso that isn’t quite to your taste. That’s the fun of this, no? The Diletta Bello+ is the perfect espresso machine to have by your side to tinker and discover the best flavoring.
Should you buy the Seattle Coffee Gear Diletta Bello+?
Buy it if...
Don't buy it if...
How does the Seattle Coffee Gear Diletta Bello+ Espresso Machine compare?
To save money, you could purchase the Seattle Coffee Gear Diletta Bello Espresso Machine, which is about $200 cheaper. Unfortunately, it lacks the digital temperature display and all the PID settings with the Diletta Bello+.
Italian-style espresso machines can feel intimidating so that newbies could opt for the Breville Barista Express Espresso Machine. It has a coffee grinder built in, a hot water dispenser and frother, and some ability to adjust the temperature. There’s even a built-in tamper. At $700, it’s more affordable and gets you used to learning how to use an espresso machine until you can work your way to the Diletta Bello+ Espresso Machine.
How I tested the Smeg Drip Filter Coffee Maker
- Used the machine to make an espresso every morning and some afternoons for two weeks
- Spent time trying out the various portafilters, temperatures, and wands
- Tweaked quantities to get the best results
I tested the Seattle Coffee Gear Diletta Bello+ Espresso Machine for two weeks in my home in Dallas, Texas. I used the espresso machine with the Eureka Mignon Notte Espresso Grinder and Acaia Lunar Scale to complete my testing. I made at least one, sometimes two, espressos or espresso-based coffees each day.
Read more about how we test.
- First reviewed: September 2023
