Planoplan is an online design app that enables you to draw very accurate 2D plans and create realistic 3D models and renders, filling the room with furniture and flooring to create superbly visualized results.
However, if you’re using a Mac we’d strongly advise against using it in your browser: it’s painfully slow in Safari and wouldn’t work for us at all in Chrome. If it were just a web app we’d score it very low, but thankfully you can also download it for Windows or for Mac and run it on your computer instead. That makes a huge difference to its speed and usability.
For alternative programs, head to our guide covering the best interior design software around.
Planoplan: Installation & interface
If you’re installing Planoplan on a recent Mac you’ll need to override your Mac’s security settings in System Preferences when you try and run the installer your Mac will refuse to do it because “Apple cannot check it for malicious software.” But it’s worth jumping through that hoop because the app runs very well and very quickly.
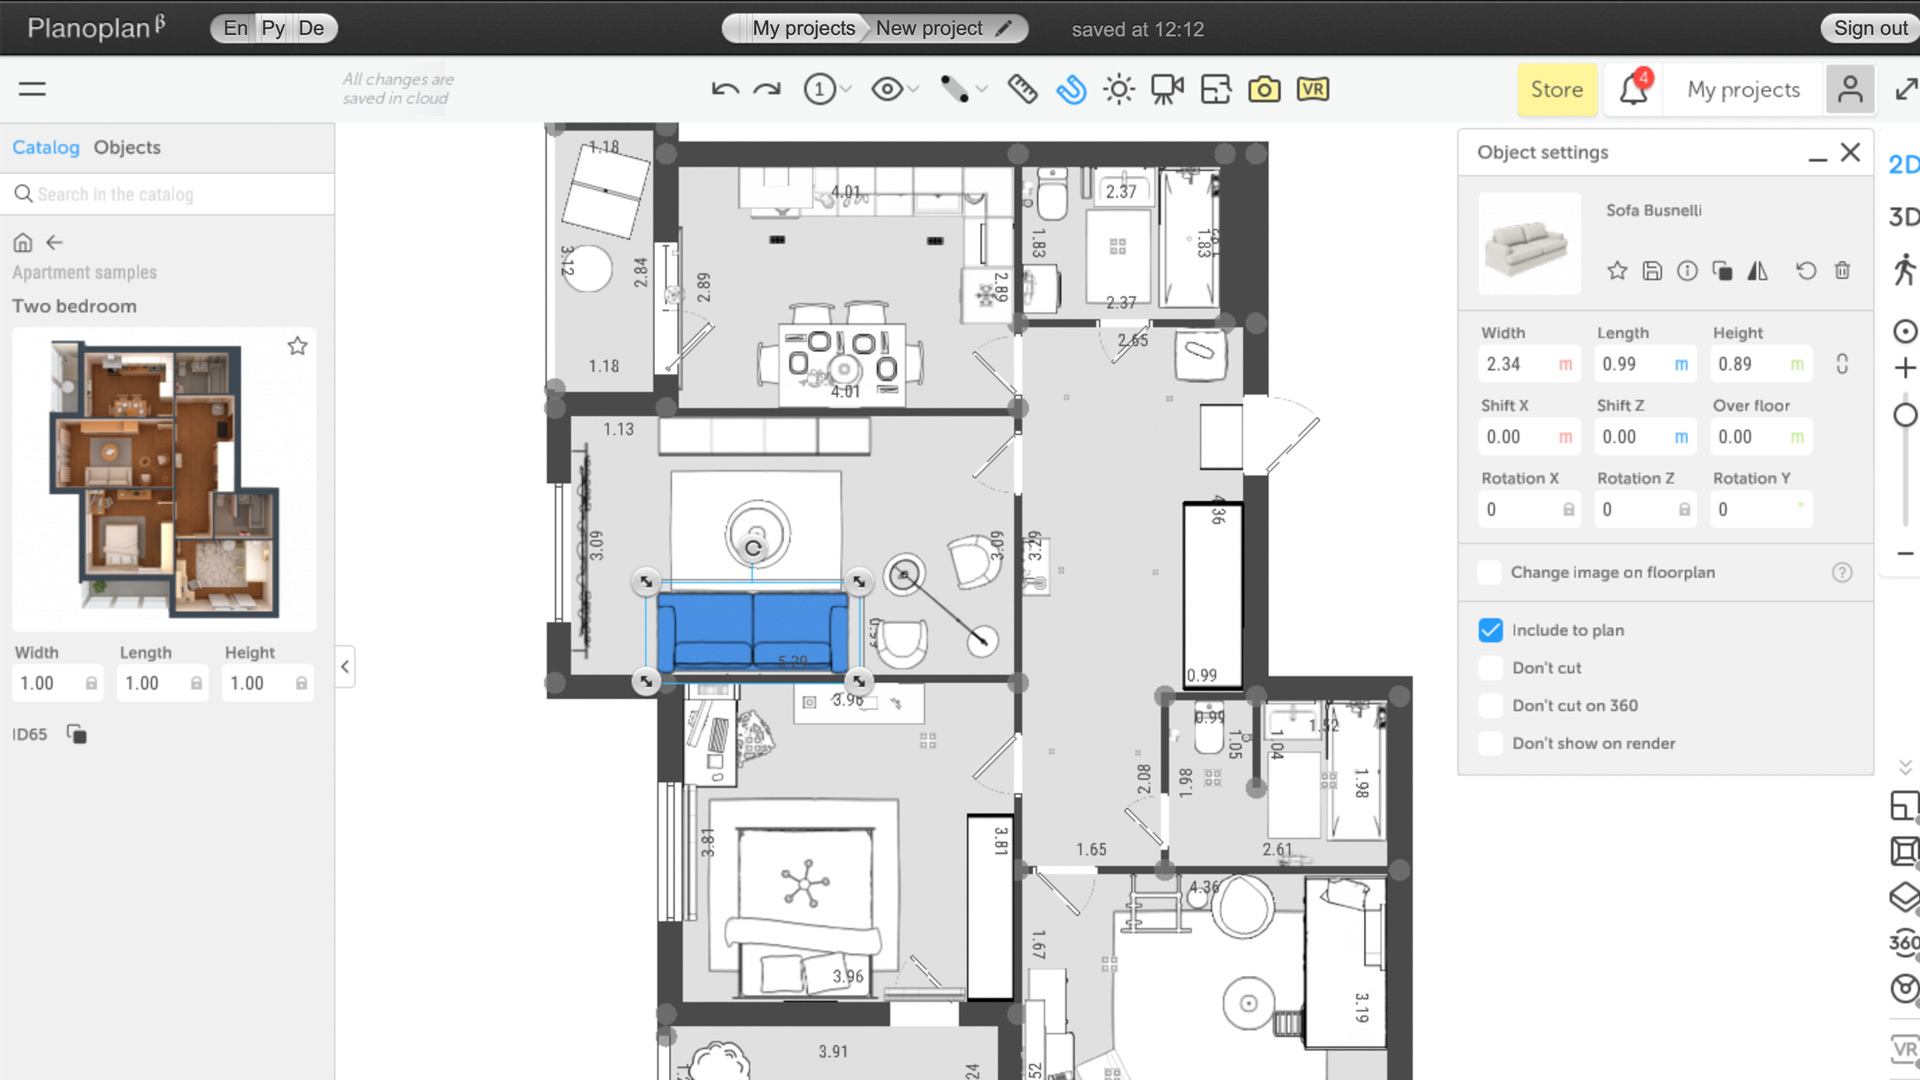
The interface is straightforward enough, with a library of components and items at the left, toolbars at the top and right, and a context-sensitive panel that appears when you select an item. This panel enables you to change the properties of the item, such as the color of a wall or the dimensions of a piece of furniture. It looks very modern and feels very responsive.
Planoplan: 2D mode and room design
Creating a room is simple. Just select the create tool from the top toolbar and draw its shape on your 2D grid. The walls automatically snap to each other and to the underlying grid (you can turn this off if you want to) and when you complete your room its dimensions will appear. You can then use the inspector panel to give it a label, to change its properties, or to specify whether it has a ceiling and a floor. If you wish, you can import an existing floor plan as a JPEG and then draw on top of it to create your own, editable version.
Once you’ve made your room the next step is to go into the object library, called the Catalog. This is where you add tables and beds, lighting and decor, fitted wardrobes, and other key elements. It also enables you to drag doors and windows onto the walls of your room(s) and adjust their size and opening direction.
You can adjust item properties in 3D view but for creating new designs it’s much faster to work in 2D.

Planoplan: 3D views and rendering
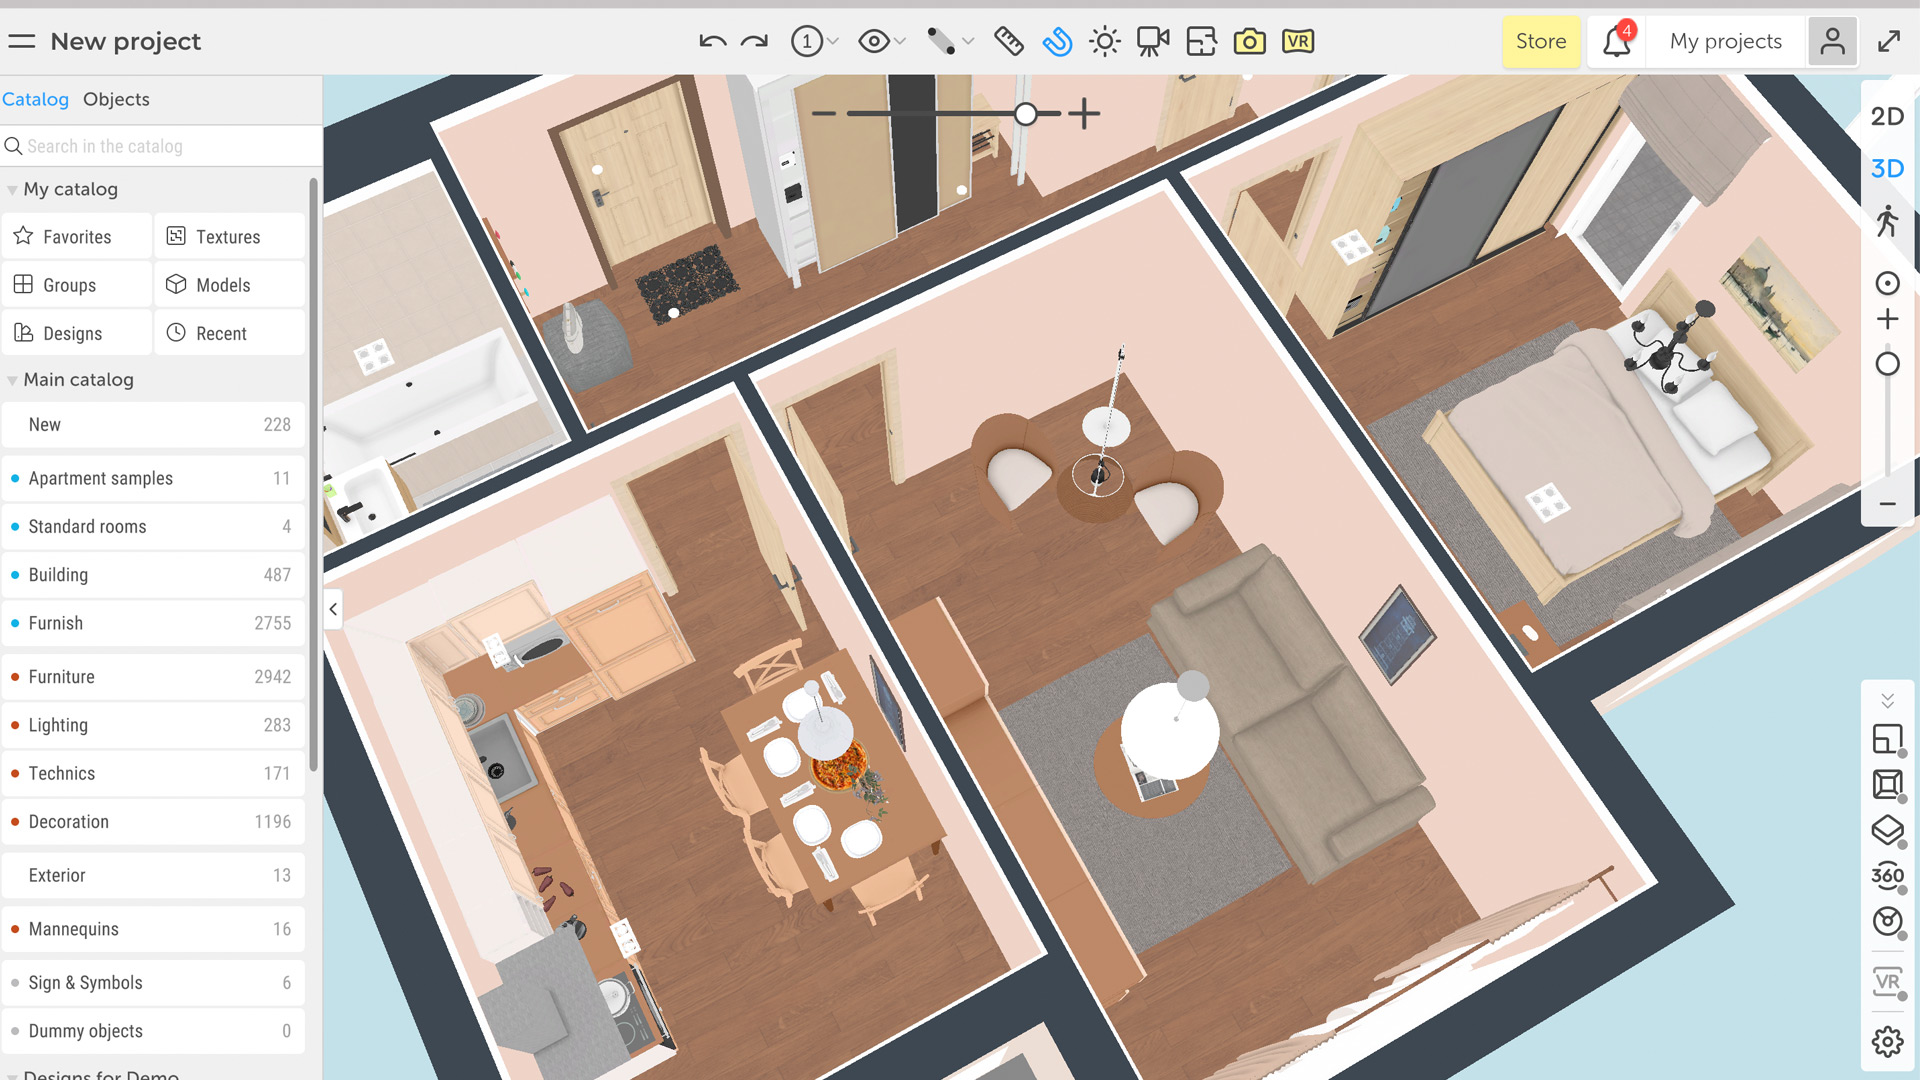
Once you’ve created your room in 2D, the next step is to go into the 3D mode and apply wall colors and other material properties to make the design more closely resemble what you’re making. This is where you’d use materials such as wooden floors or ceramic tiles, and you can upload your own textures too.
When you’re happy with the design, the next step is to render it. There are two options here, a rendered image and a VR panorama, and both of them are processed remotely on Planoplan’s servers. That means they take some time to create, but the results are impressive. You can enable or disable the background, adjust the time of day, location of the sun, and intensity of its light, and you can also adjust the altitude of your building for more accurate lighting.
When you create your rendered image you have four options: 800 x 450 for testing, 1,280 x 720 HD, 1,920 x 1,080 Full HD or 3,840 x 2,160 for 4K. There are two quality options for each: Speed and Quality. There are two quality options for the VR panorama.
Creating renders and panoramas is not dependent on the hardware you have, which is good news for anyone with an older computer. The downside is that if you have a really quick computer, such as our test Mac, you don’t benefit from the hardware you have either. Creating a VR render of a fairly stark living area took 15 minutes; a standard HD photo render of the same space took seven minutes. The renders do a great job of bringing your designs to life thanks to realistic lighting and good use of textures.

Planoplan: Pricing
So far we haven’t spoken about money, but it’s going to be a key consideration when you use this app. As with many other apps in this sector, the pricing is complex in order to keep the headline price low: you can only make so many models, renders, or panoramas before you’ll hit a limit.
The limit you have depends on your subscription plan. There are three plans: Pro, Pro+, and Business VR. The first gives you a project area of up to 1,000 square meters and the ability to create up to five models and five test renders per day. You can create ten VR panoramas per month. That costs $10 per month.
Pro+ gives you a space of 30,000 square meters, 10 test renders per day, and ten higher-quality VR panoramas for $30 per month. Business VR gives you 100,000 square meters, 300 test renders per day, and ten high-quality VR panoramas. It’s $120 per month.
Once you reach the limit of your plan you can buy packs of the features you want, so for example 10x HD or Full HD renders are $10, and 10x 4K renders are $43.
As we’ve said in reviews of other apps, we’re not a fan of this pricing model: it makes it very difficult to judge how much an app will actually cost. But it’s very common in home design and the prices here don’t seem excessive compared to rivals.
Should you buy Planoplan?
There’s a lot to like about PlanoPlan, especially if you’re new to design software. It’s very easy to use, produces great results and the ability to use your own models and textures is very useful. It lacks some of the advanced features of some rivals, such as cost calculators and landscaping, but for indoor home design, it’s definitely one to check out. The free trial means you can put it through its paces without committing any cash.

