– An Instant Pot (like the Instant Pot Plus)
– Recipe ingredients
– Measuring cups and/or spoons for precision
– Wooden spoon or tongs (depending on the recipe)
For all the hype around air fryers, there's another countertop appliance that can be revolutionary for home cooking yet doesn't get the same level of attention: the Instant Pot.
Although it's technically a pressure cooker, its multifunctionality sets it apart. It can prepare meals in a fraction of the time.
The best Instant Pots combine speed, versatility, and convenience in a single appliance. They can sauté, slow-cook, steam, yogurt, and bake.
However, this multifunctionality can initially make it a bit overwhelming and confusing. In this guide, I'll take you through a step-by-step guide on using an Instant Pot and other similar multi-cookers, including what to look out for and how to make the most of its features. I also get expert tips and troubleshooting advice from Marcus Lux, UK Export & Business Development.
How to use an Instant Pot: quick steps
- Set up the Instant Pot
- Add ingredients and liquid
- Select your required cooking program
- Release pressure safely
- Open the lid and serve

Marcus Lux is Head of UK, Export & Business Development at premium household electricals manufacturer Gastroback. With over 30 years’ experience selling quality products around the world, Gastroback’s aspiration is to set trends focused around design, high quality materials, professional performance and safety.
How to use an Instant Pot: Step by step guide
1. Set up the Instant Pot
Before diving into cooking, it's worth familiarising yourself with your chosen Instant Pot.
The base unit contains the heating element and the control panel, which must be kept away from water. The control panel allows you to select your cooking mode, adjust the time, and control the pressure levels.
The stainless steel inner pot holds your ingredients. The sealing ring inside the lid creates the airtight seal needed during cooking. The steam release valve regulates pressure and is also on the lid.
"You might be tempted to ignore an essential bit of kit that comes with the product – the information booklet!" says Lux. "But with multi-cookers, it’s worth extra effort to read through the instructions to get the most out of the product."
To get set up, put your Instant Pot on a flat, stable surface and check that the inner pot is correctly seated in the base unit (you won't be able to close the lid if it's not).
Finally, attach the sealing ring to the lid, ensuring it's securely in place, and turn the steam release valve to the 'Sealing' position to stop steam from escaping prematurely.
2. Add ingredients and liquid
Add ingredients to the inner pot once your Instant Pot is set up. Avoid overfilling the pot, though, as it can impact how well the food cooks. Use the Max line inside the inner pot as a guide to prevent this from happening.
All recipes typically require at least one cup of liquid, such as water, broth, or sauce, to generate the steam needed for pressure cooking. Measure the necessary liquid and pour over the ingredients.
3. Select your required cooking program
Using the control panel, select the cooking function based on your recipe, Instant Pot model, or the type of food you are making.
"Multi-cookers are multi-functional," explains Lux. You can use them for one-pot dishes, soups, steaming vegetables, or even baking cakes. Many have pre-set programs like rice, fast cook, and porridge."
Almost all Instant Pots have the most common cooking modes: Pressure Cook, Slow Cook, Sauté, and Yogurt. Other models, like the Instant Pot Duo Crisp, add an air fryer function. Alternatively, most Instant Pots list different food options on their control panels, and you can select from Soup/Broth, Poultry, Bean/Chili, Rice, Porridge, and more.
The buttons provided allow you to adjust the cooking time and pressure level. For example, if you’re cooking tough cuts of meat or dried beans, selecting High Pressure will likely yield the best results. Confirm your settings and press Start.
It may take a few minutes to build up the necessary pressure before the timer starts counting down. You’ll know the pot has pressurized when the float valve pops up. If the Instant Pot doesn’t pressurize, check that the steam release valve is set to seal, the lid is locked securely, and the sealing ring is in the correct position.
Also, ensure there is enough liquid in the pot to create steam. If there isn't, you may see an error message like Burn on the display. To fix this, stop the cooking cycle and release the pressure carefully. Stir the contents to ensure nothing is sticking to the bottom, add more liquid, and restart the cooking.
4. Release pressure safely
After the cooking cycle finishes, you must release the pressure before opening the lid. To do so quickly, carefully turn the steam release valve to the Venting position and stand back to avoid getting a blast of steam on your face. This allows the steam to escape quickly.
If steam sprays out violently during a quick release, it may be due to the type of food you're making. For dishes like oatmeal or soups, which can create foam, release pressure in short bursts by slightly adjusting the valve before fully opening it.
For a natural release, let the pot cool and depressurize for 10–30 minutes before removing the lid. The float valve will lower, indicating that the pot has depressurized.
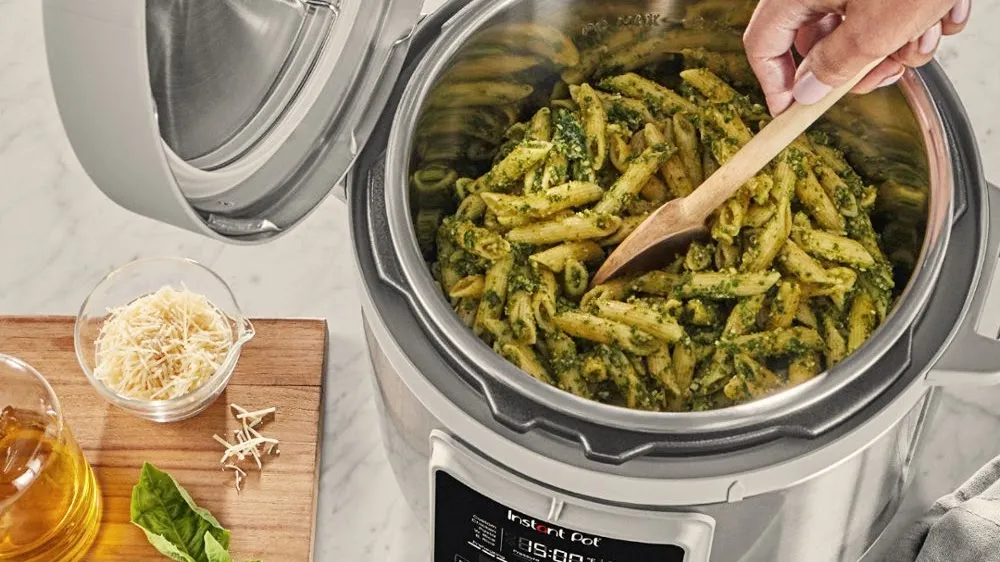
5. Open the lid and serve
Once the float valve drops, it’s safe to open the lid.
Twist it counterclockwise and lift it away from you to avoid any residual steam. Stir your dish and check whether the meat is cooked through or the vegetables are soft (or to your liking).
If further cooking is required, you can use the Sauté function to finish it off without setting up a new pressure cycle.
If food is undercooked, close the lid, ensure the steam release valve is set to seal, and run another cooking cycle.

How to use an Instant Pot: FAQs
Can I use my Instant Pot to cook frozen foods?
Yes, the Instant Pot is great and quick for cooking frozen foods like chicken breasts or roasts, but there are a few things to bear in mind.
You don't need to thaw the frozen food first. Put it straight into the inner pot with cold liquid, ideally on a trivet. Don't put hot water or stock in with frozen food; this can prematurely thaw the ingredients. Be aware that frozen ingredients can take longer to pressurize—don't panic if the timer doesn't start as quickly as usual. Add an extra 10–15 minutes to the cooking time for significant cuts of meat.
As with fresh food, always check that your food is fully cooked and hot before serving to avoid food poisoning.
Why does the sealing ring smell?
Over time, the sealing ring can absorb strong food odors, leaving it feeling greasy or smelling bad.
The best way to avoid this is to clean the ring after each use and buy a spare for recipes with strong or distinct flavors, especially fish.
Steaming water, vinegar, and lemon juice in your Instant Pot can help deodorize it and keep the seal and inner pot fresh.
Final thoughts
"A multi-cooker can be a real game changer when used as an extra cooking source in a busy kitchen or large household," according to Lux, "but there is a risk of information overload."
Lux recommends looking for models with clear displays, intuitive operation, and flexibility to adjust cooking times to your tastes or needs. These models are worth the money and the time spent learning to use them effectively.
Following these steps will allow you to enjoy fast, efficient, and flavorful meals, from stews to desserts and everything in between.
