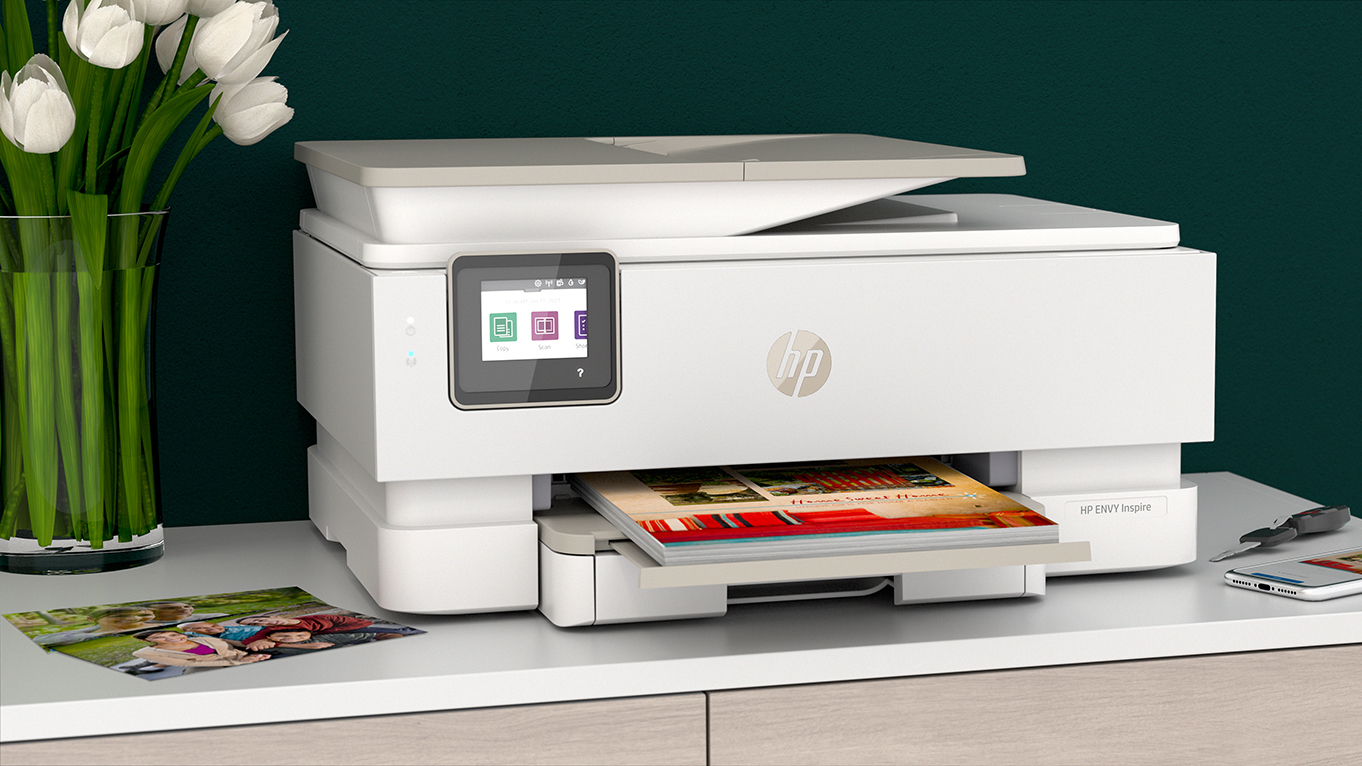
Knowing how to scan on a HP printer is one of the many ways that you can make the most out of it. Having a good printer is essential, no matter whether it's in constant use or you just need it to print out the occasional email confirmation.
Ever since the ‘90s printer manufacturers have been squeezing multiple functions into the best compact printers, all in one printers and more. They've added flatbed scanners on top for copying, making digital scans and even faxing for a more ergonomic design that meant you didn’t have to clutter your home or office with several individual devices.
In this article we’ll look at how to scan and copy on HP’s popular range of all-in-one printers, covering how to get set up and print from your smartphone, desktop or laptop computer or even make copies directly through the printer itself without the need for an extra peripheral device.
How to copy a document to make a duplicate
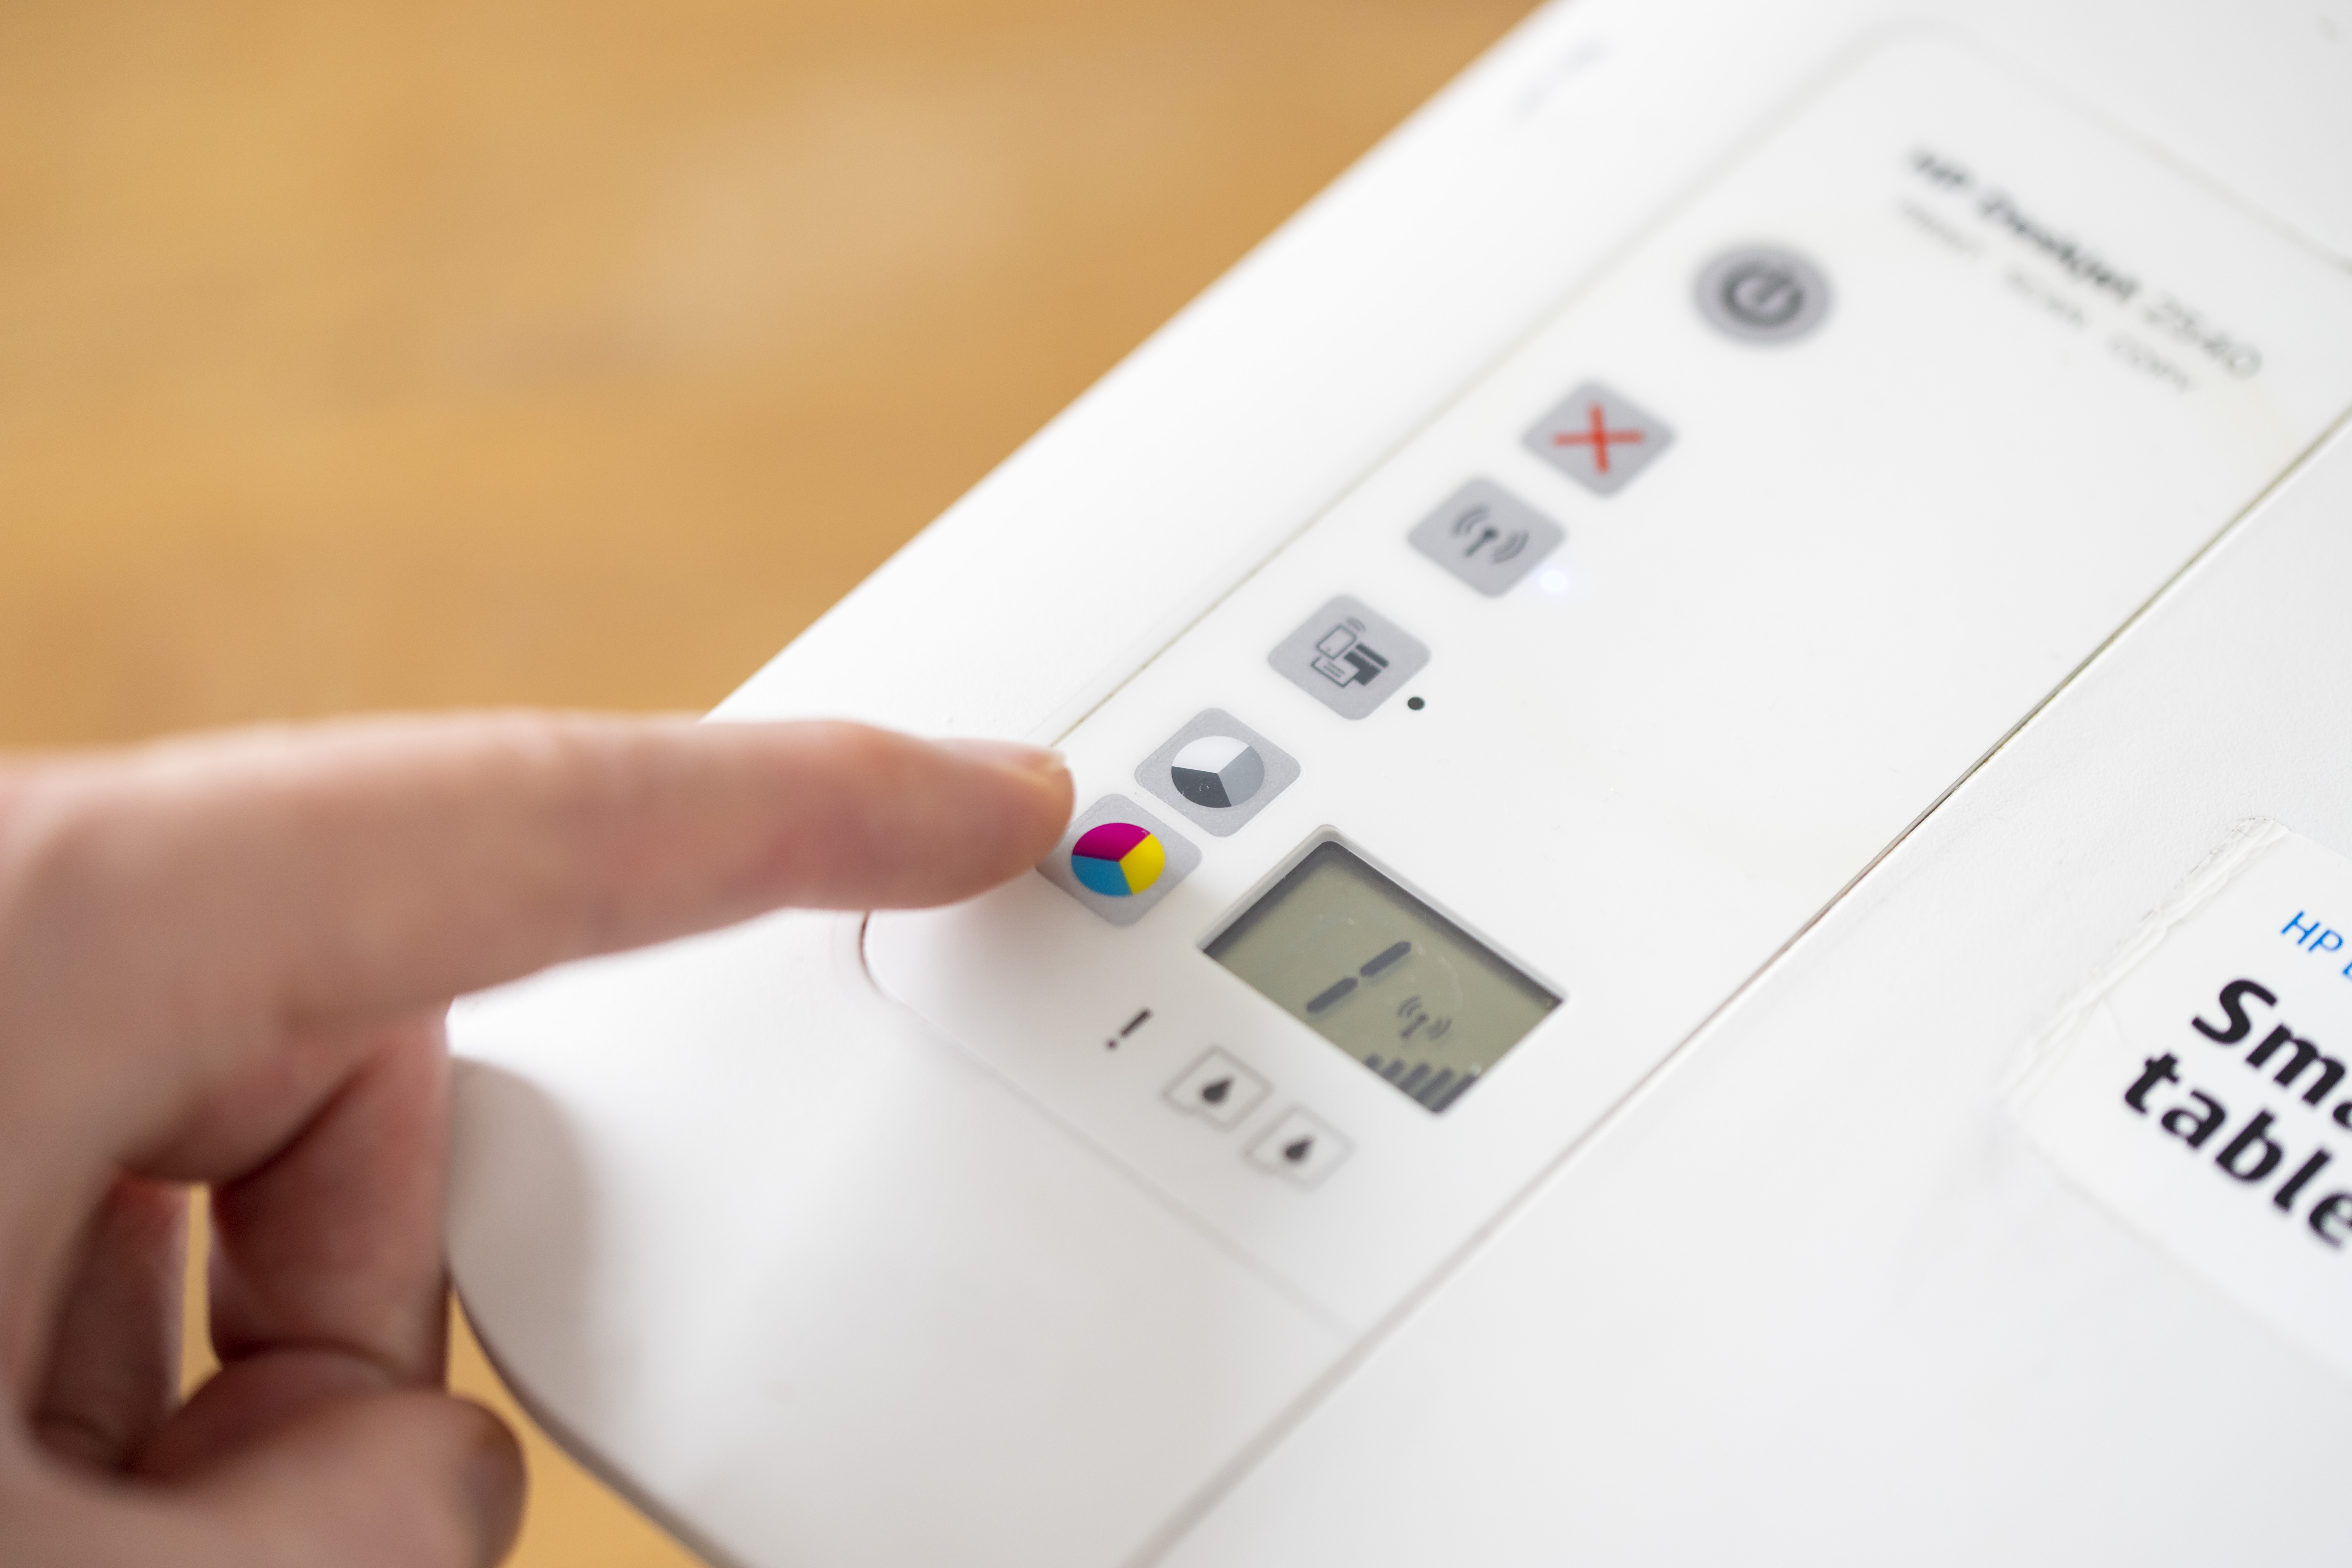
The easiest way to use the scanner on your HP printer is to create a copy as you don’t need any apps or software to carry out this task, it can all be done by the interface and buttons on your printer.
Step 1
Load your blank A4 paper into the paper tray and then open up the flatbed scanner and place the sheet of paper that you’d like to scan face down onto the glass and close the flatbed scanner.
Step 2
Now press the black and white or color scan buttons on your printer to scan in color or mono to save on ink, or navigate through the menu on the display to find the B&W or color scan options if your printer has a screen. If your document is double sided, simply flip your document over on the flatbed scanner and put your printout in the paper tray again but turn it over to print on the blank side.
How to scan on HP printer with your smartphone
Step 1
Download the HP Smart app for iOS or Android smartphones. Once installed, switch on your HP printer and then open up the HP Smart device and at the top of the app tap the Set up or add printer button and follow the on-screen instructions to set up your printer on your smartphone.
Step 2
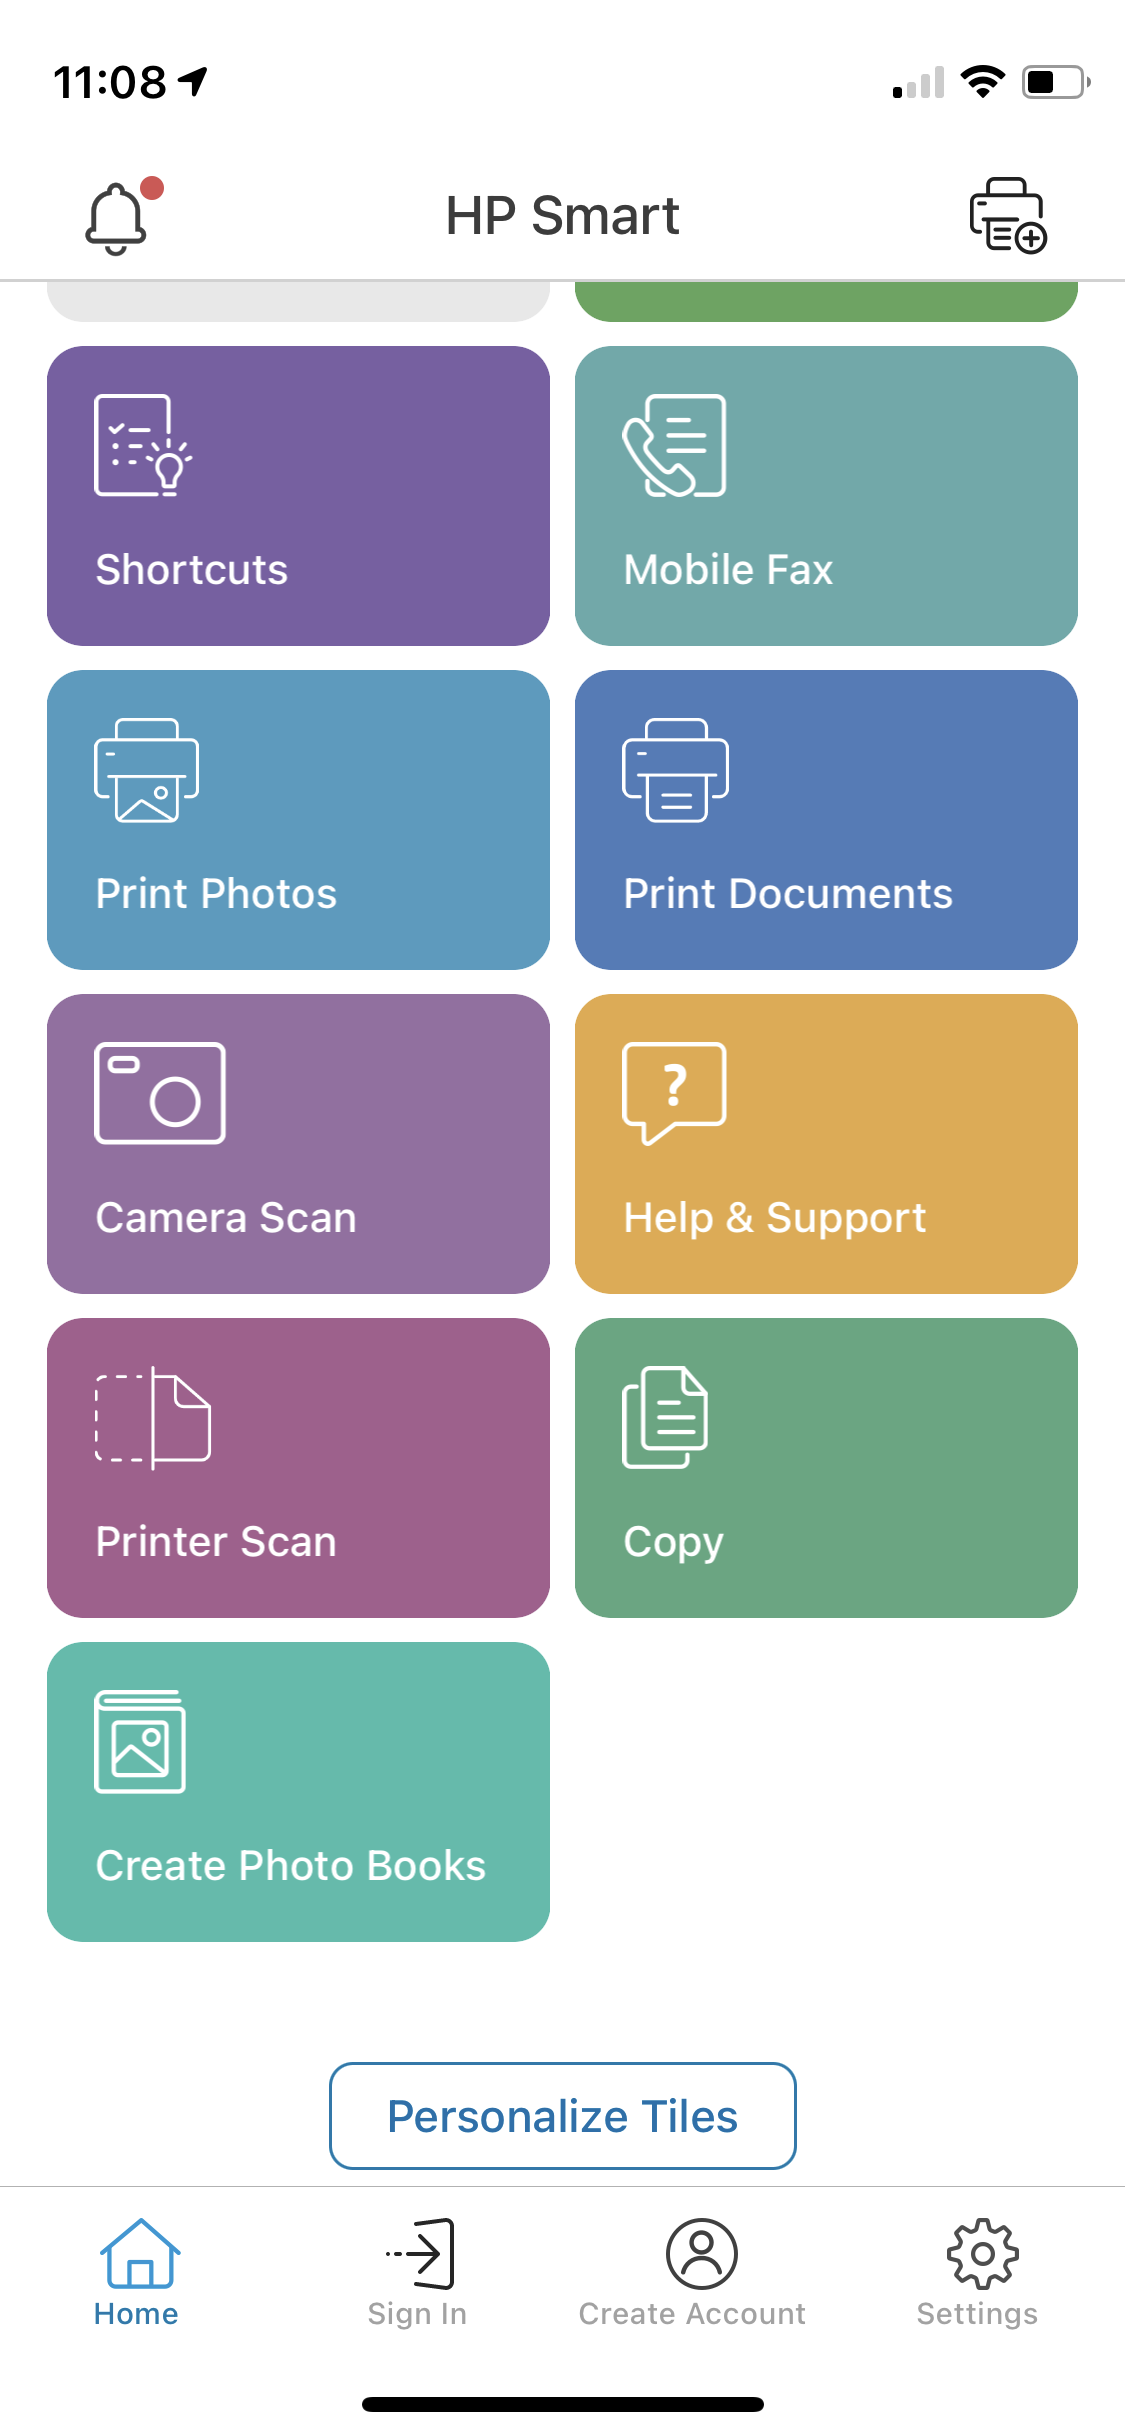
With your printer added and set up on the HP Smart app you need to go back into the main menu and tap on the Printer Scan icon.
Step 3
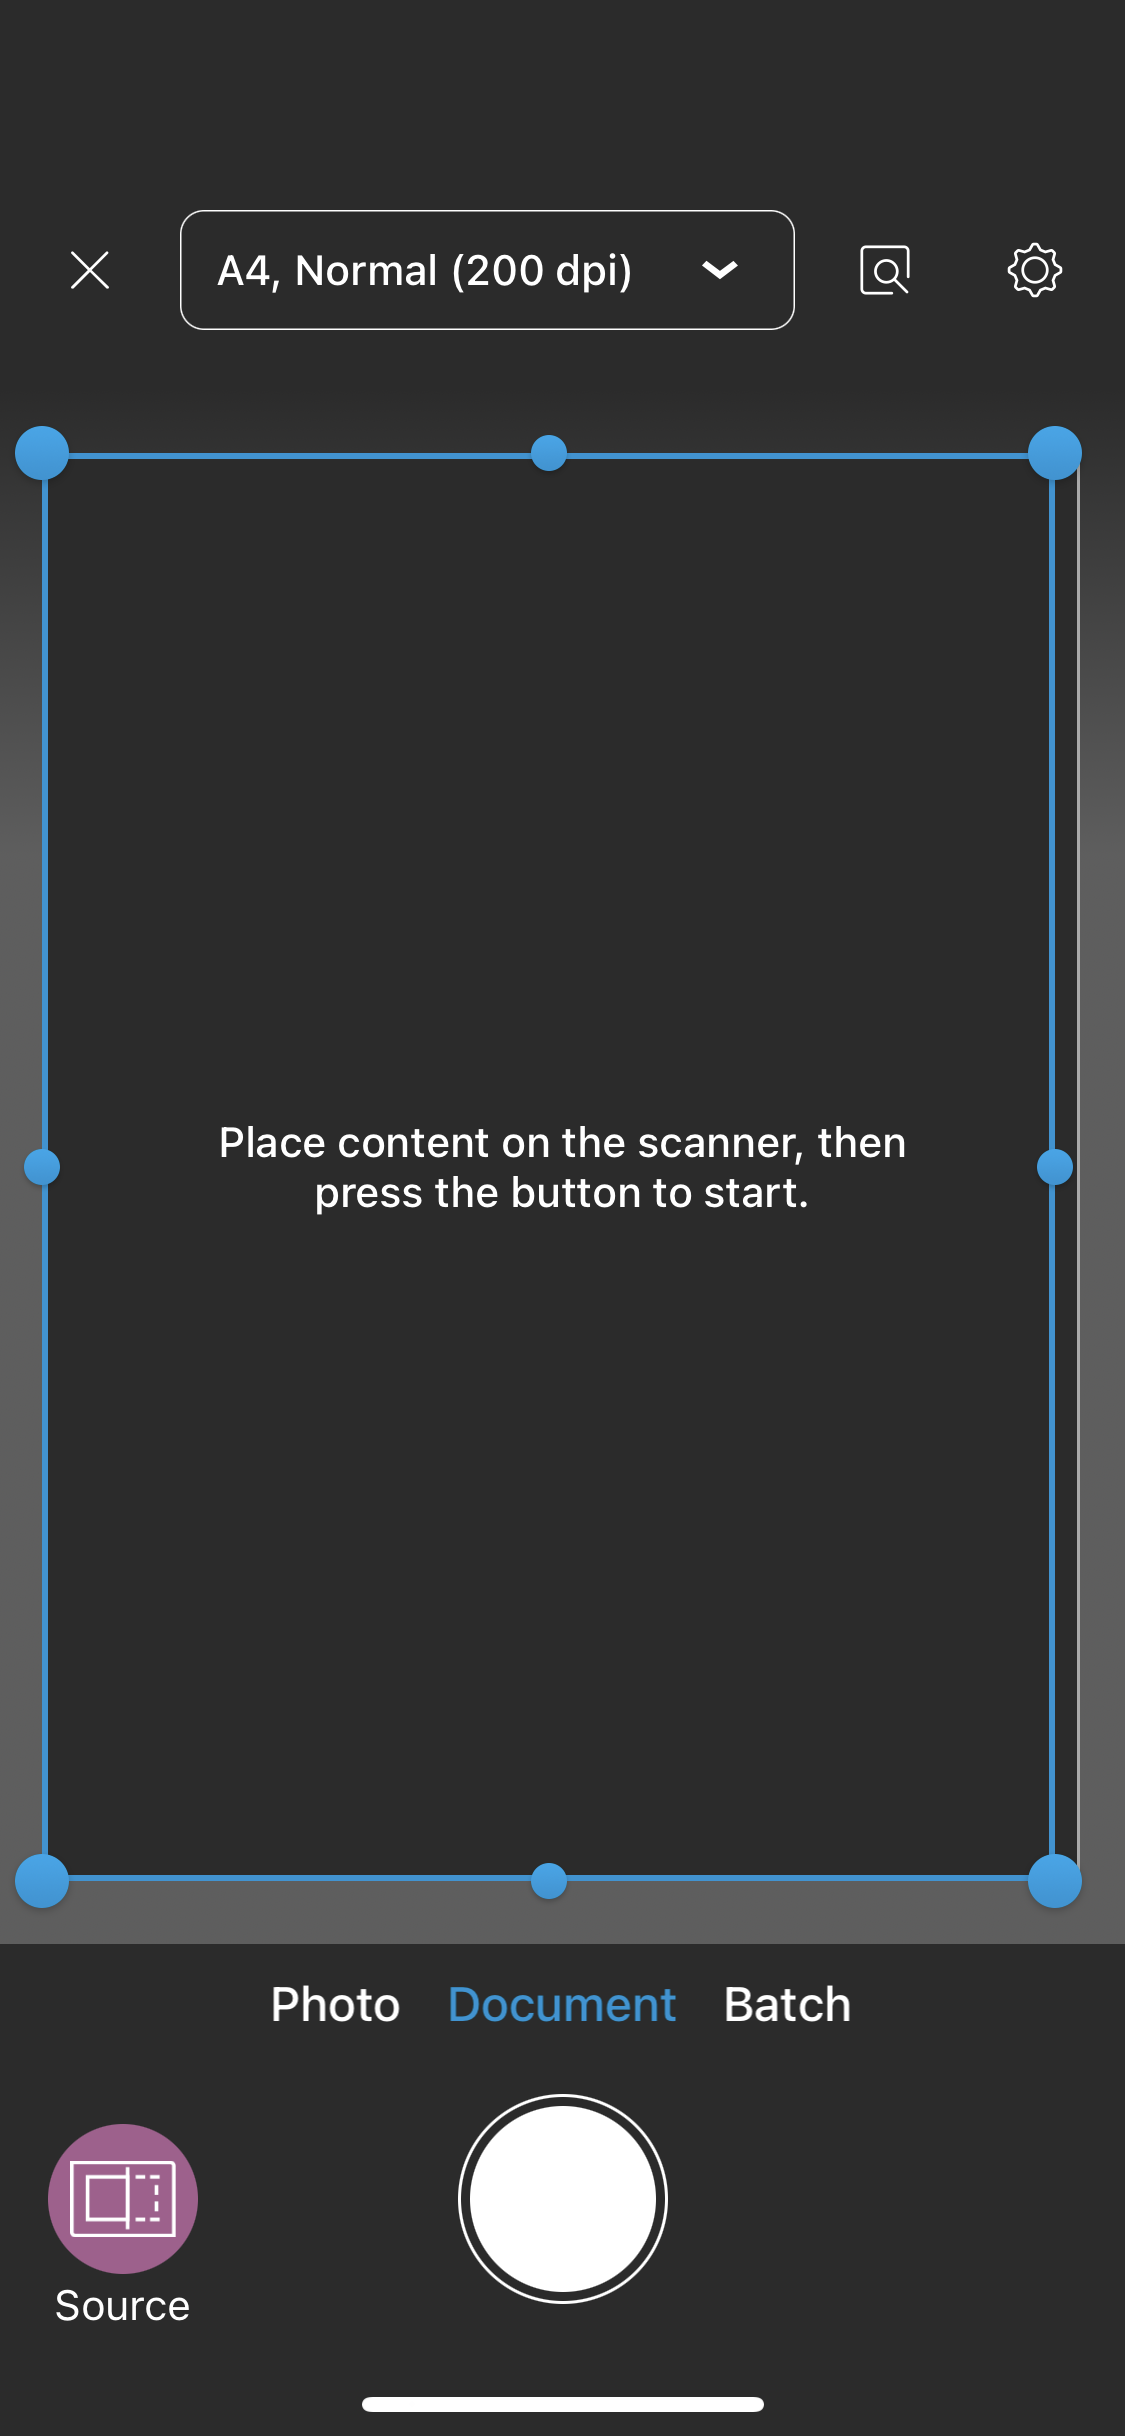
You’re now ready to scan so open the scanner on your HP Printer and place your first page on the glass face down, close the lid and tap scan in the app. You can change the settings by tapping the drop-down menu at the top to adjust the Paper Size, Quality and Color, then hit the large circle button at the bottom to begin scanning. When complete you can rotate or crop, tap the Print icon, Share/Save or Mobile Fax buttons.
How to scan documents on HP printer to your computer
Scanning via a desktop or laptop computer provides the most options and you can do so by a wired or wireless connection, but for either option you will need to use the HP Smart app on your computer.
Step 1
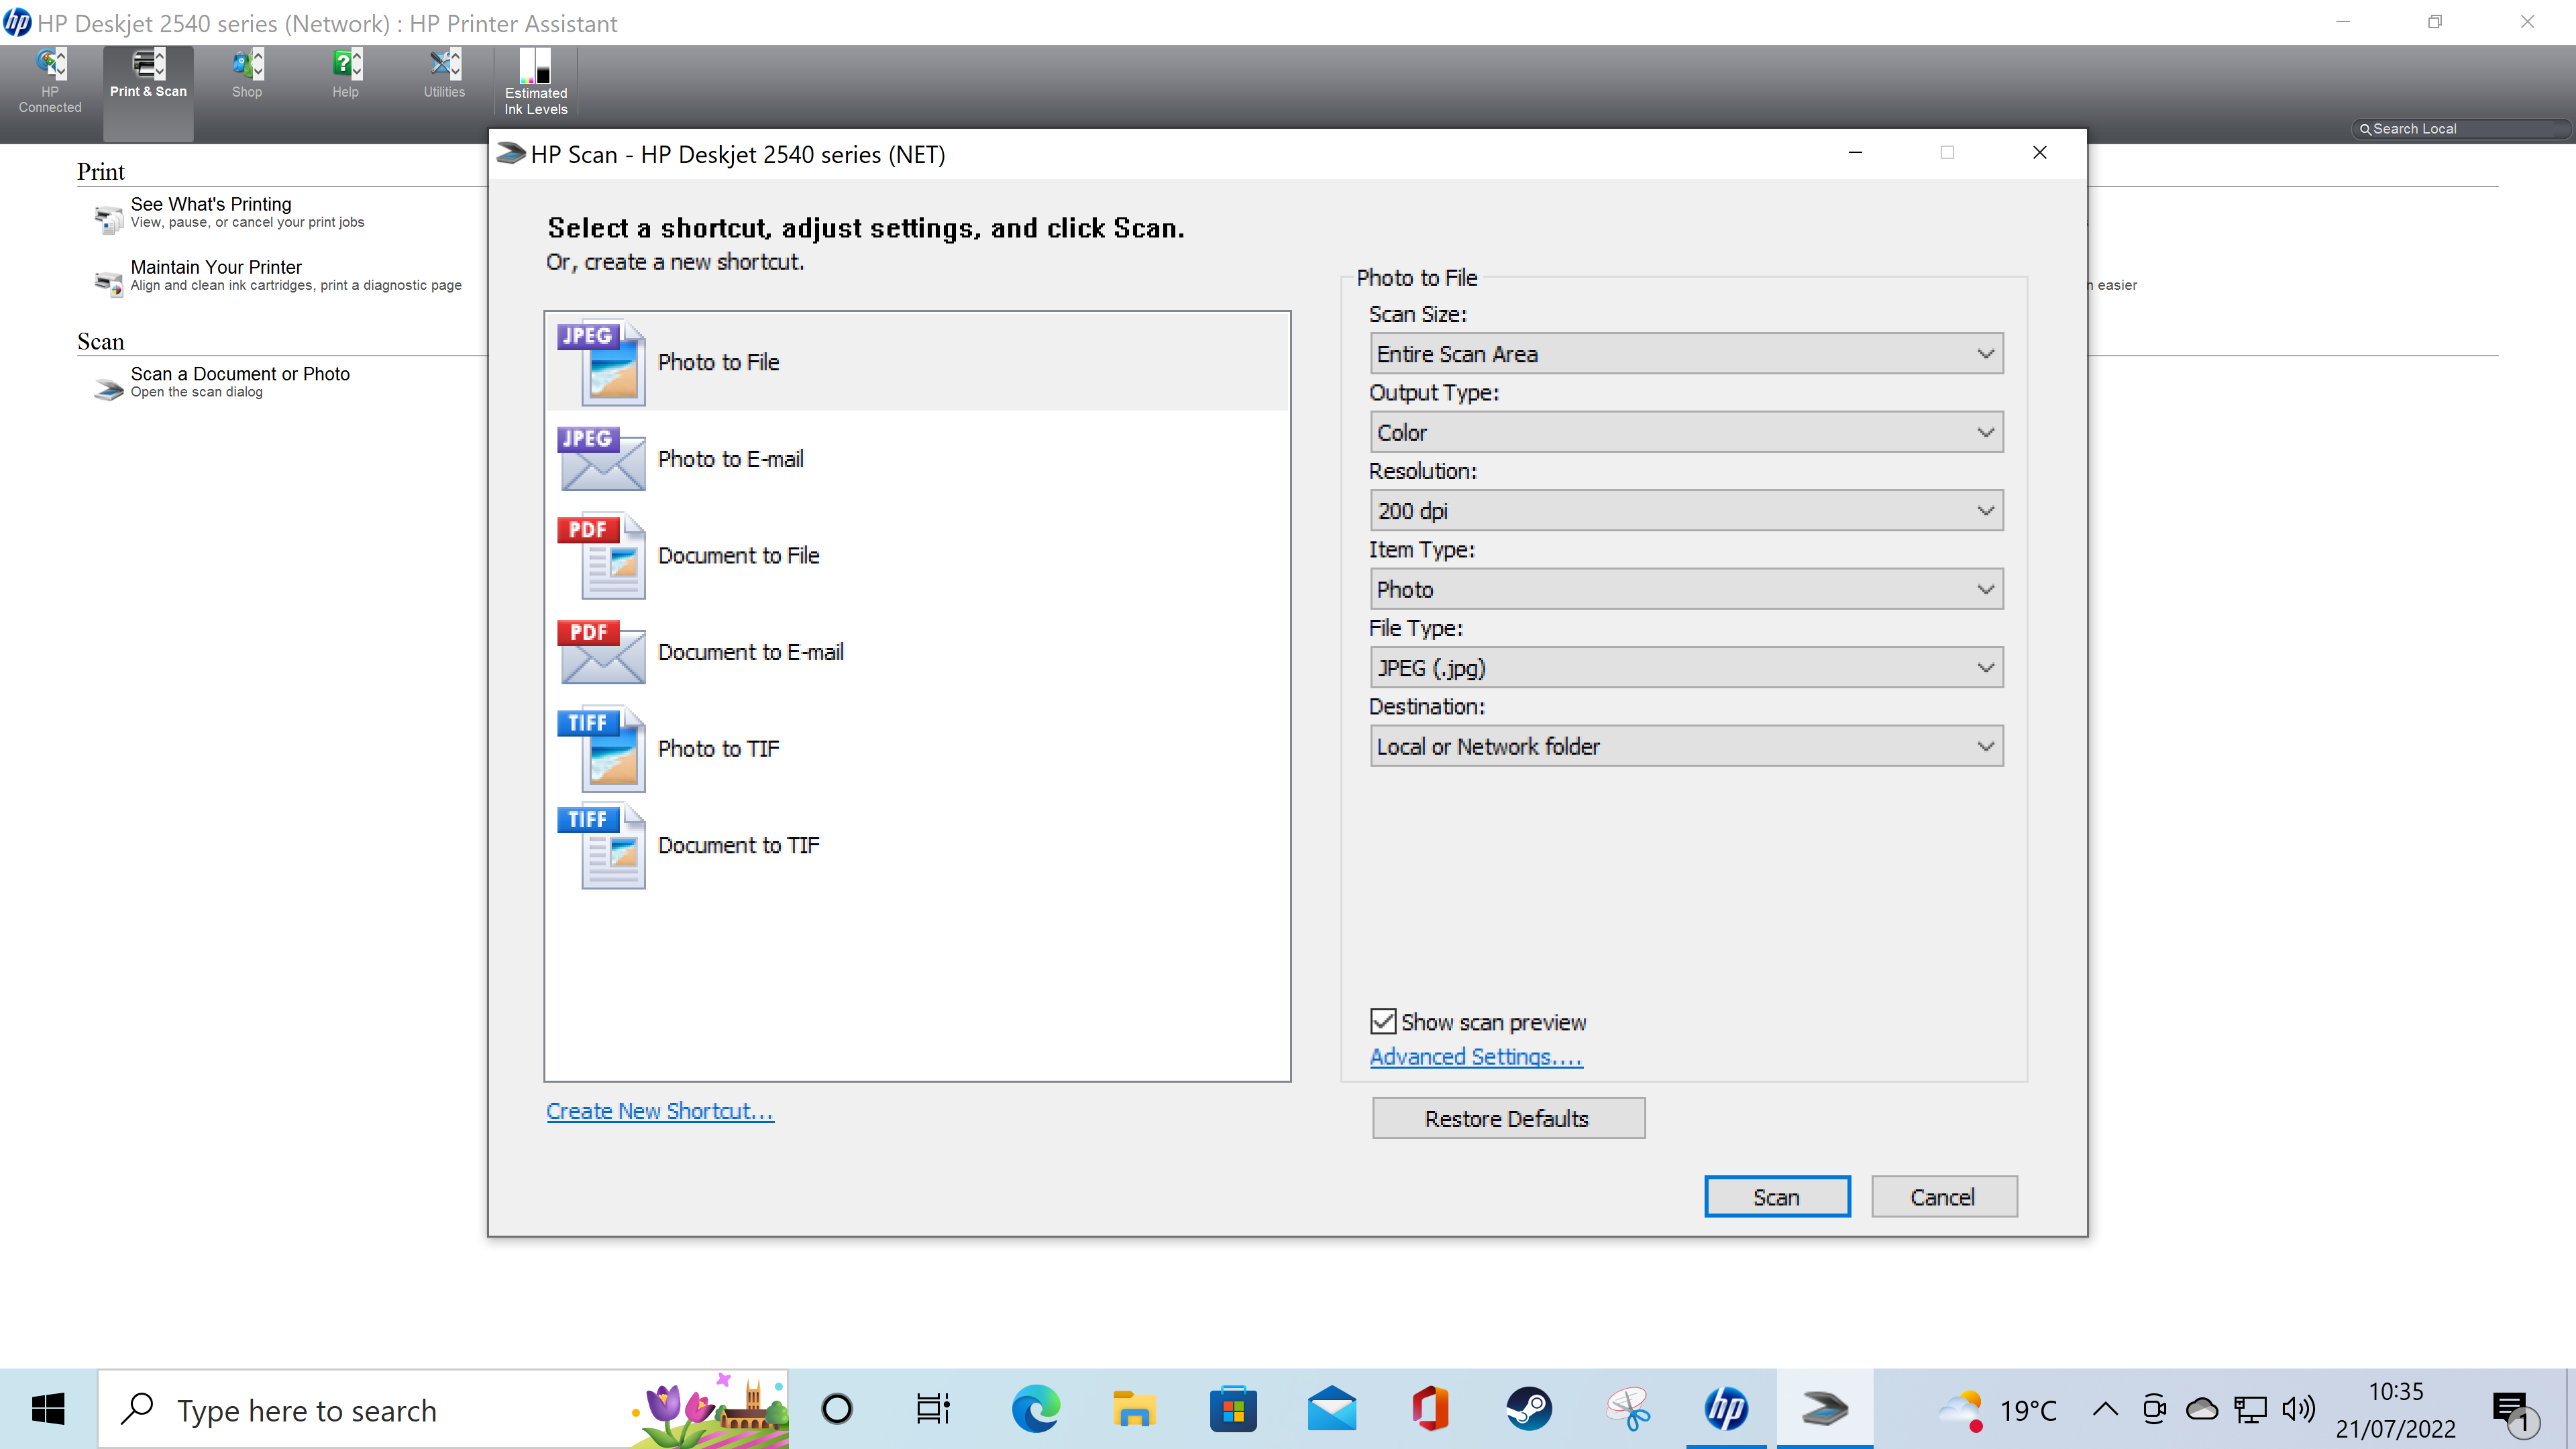
Open the app and choose the Print & Scan option from the top menu bar, you can then go down to the Scan option and click this to open the Scan dialog. Make sure the document or image you’d like to scan is placed facing down on the scanning glass and that the lid is closed on top of it.
Step 2
If you’re scanning a photo choose either the Photo to File or Photo to E-mail options, whereas if it’s a document choose the Document to File or Document to E-mail options, this will allow you to file them on your computer or attach them directly to an email that you can send. You also have the option to save as a hi-res TIF. More options on the right allow you to set the Scan Size area, whether to output as a color or black & white scan and also to set the resolution. The higher your dpi number, the better the scan quality will be but it will also take a little longer to complete. Once you’ve set all of the options, click the Scan button.
Step 3
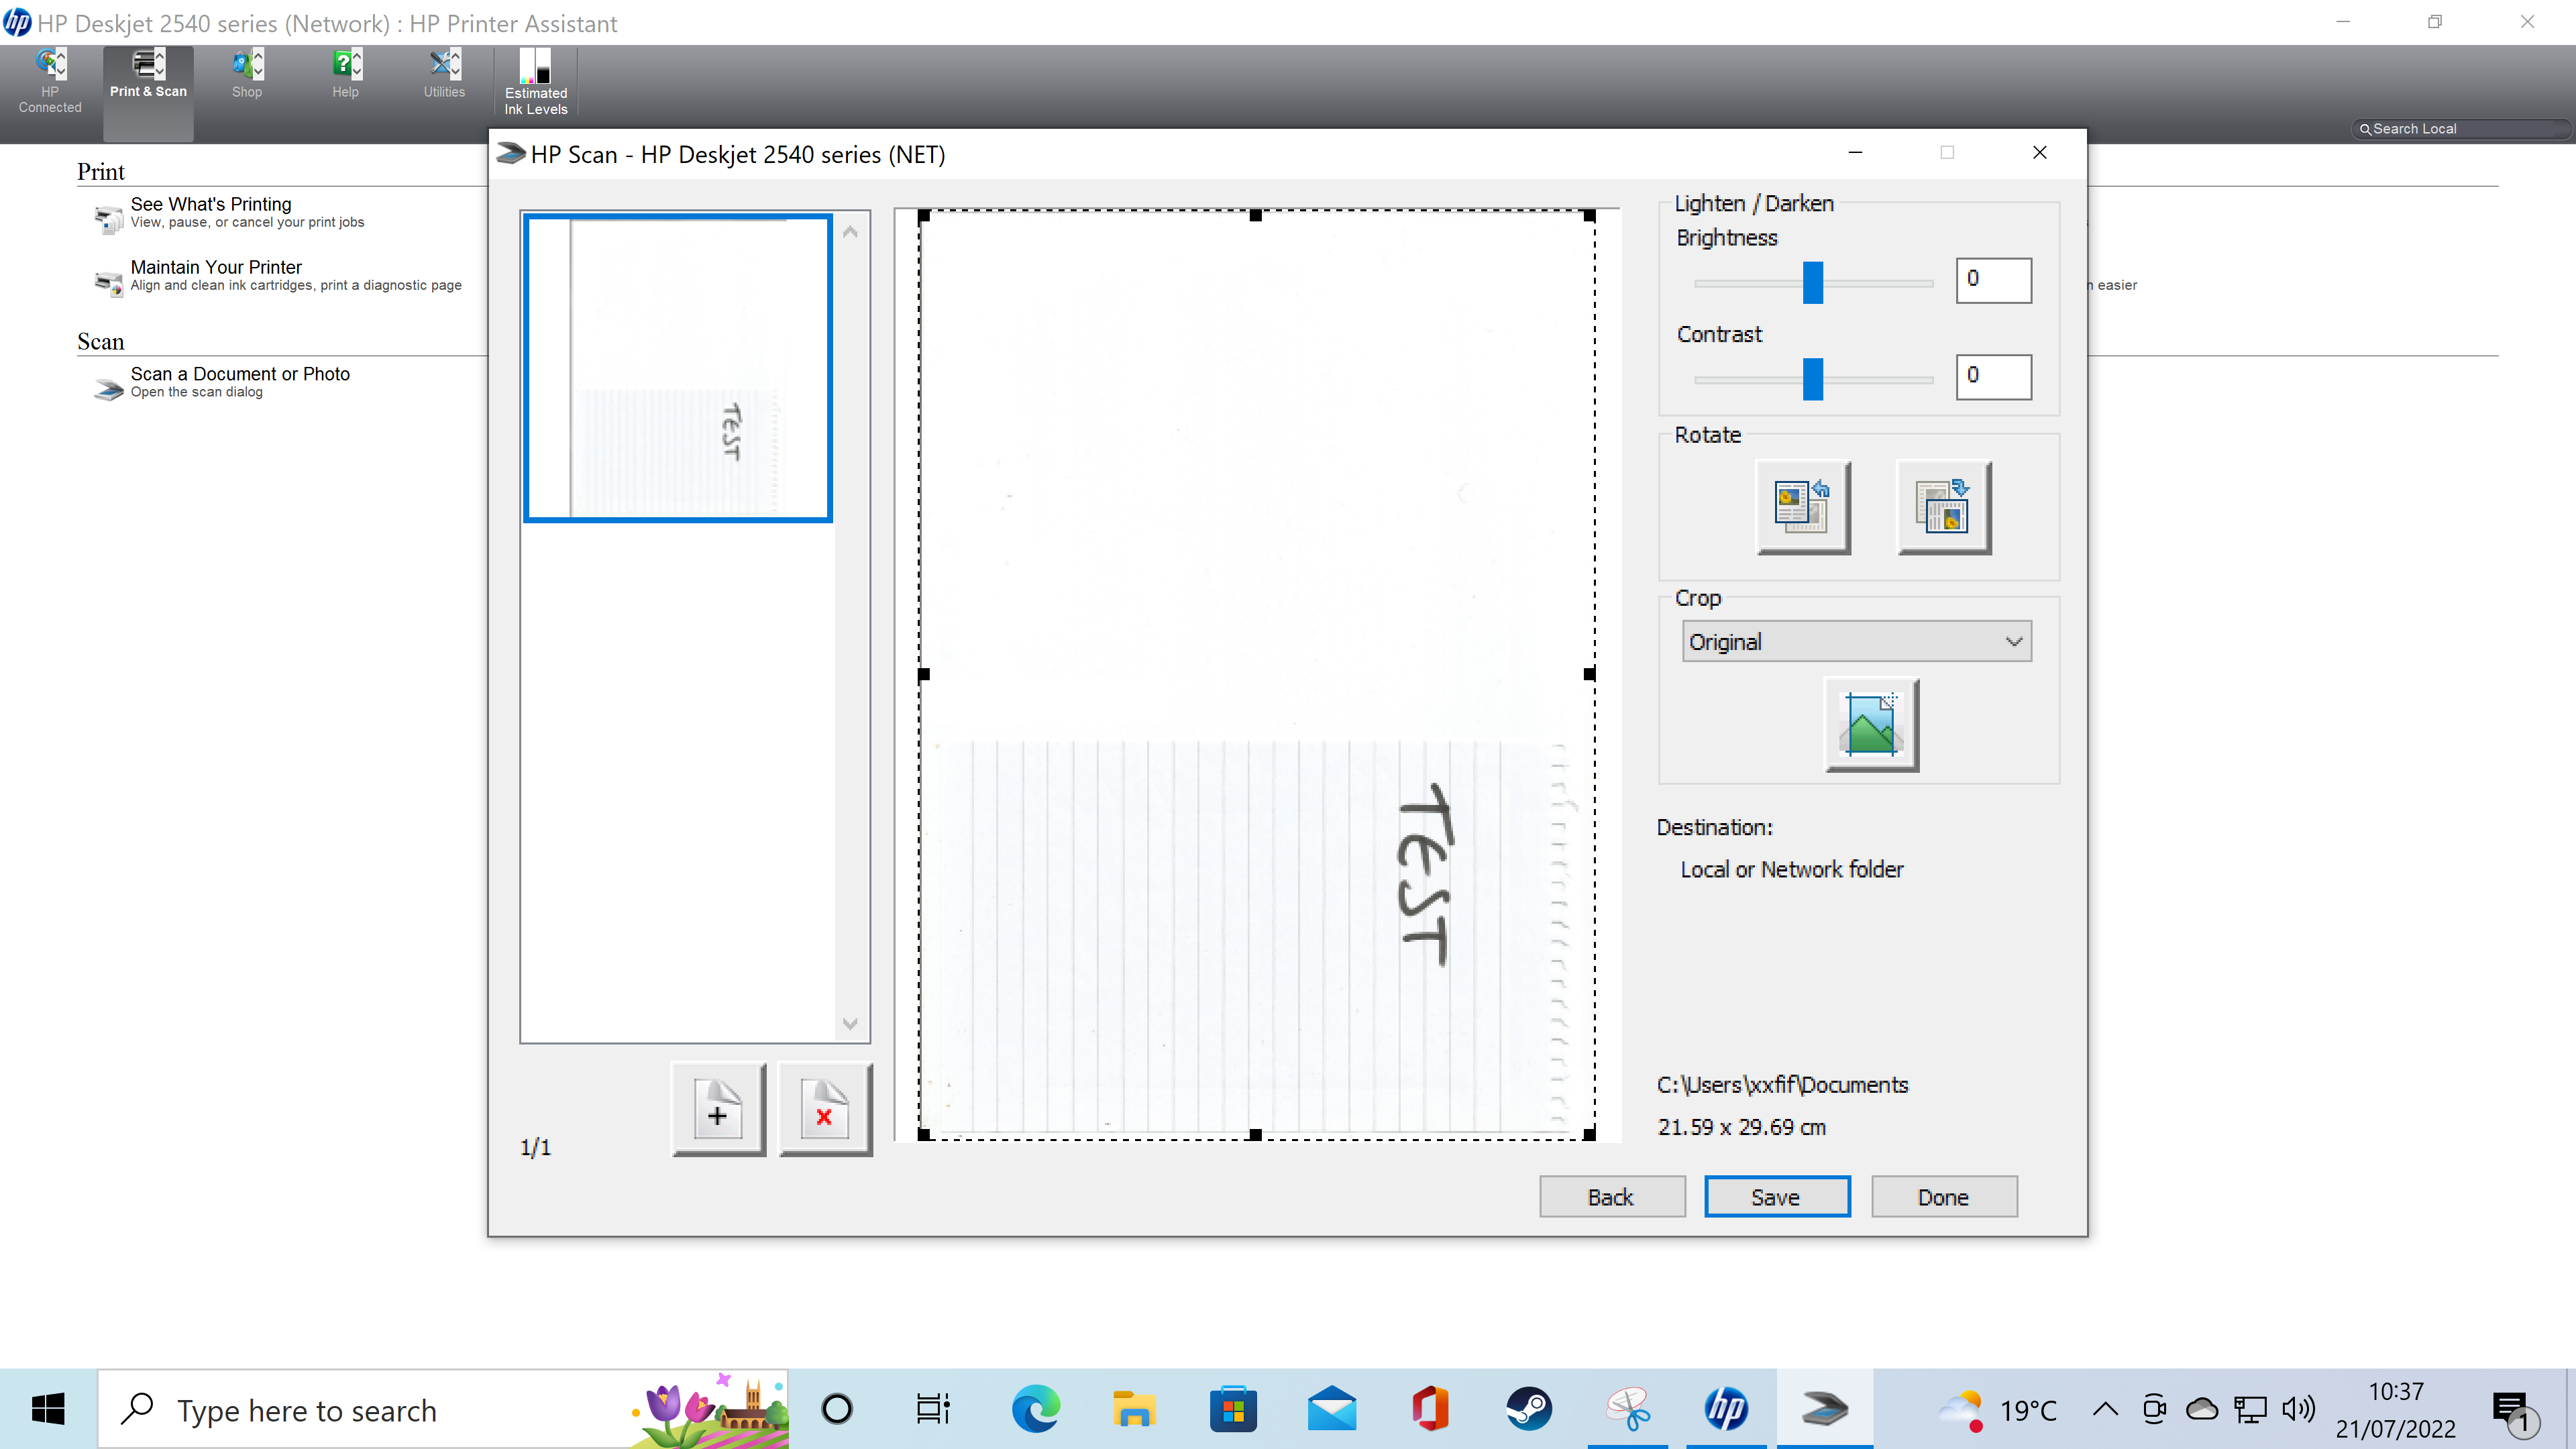
Once your document or image has been scanned you may see that the program has automatically cropped off any blank space, simply readjust the bounding box if you need to widen the scan area to include anything important that has accidentally been cropped off.
Step 4
Using the controls on the right you can make quick adjustments to change the Brightness and Contrast of your scan, as well as rotate it left or right by 90º if it’s the wrong way up. If it’s a document that you’d like to add extra pages to, switch out the document on your scanner for the new page and close the lid down on it again, then click the Add new scanned pages button in the bottom left corner of the dialog.
Step 5
When you’ve scanned all of the pages click the Save button and you can choose where on your computer to save it.
Discover more guides for the home office…
Best home computer
Best photo printers
Best keyboards for home office
Best touch screen monitors
Best smart pens
